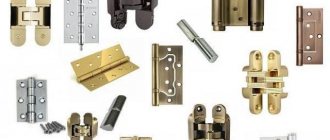
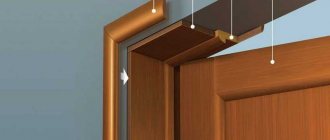
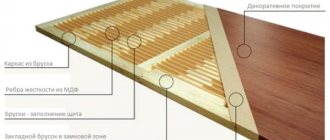
A wall stop for an entrance or interior door is one of the fittings whose function is to control the opening angle of the door leaf. It prevents damage to the canvas on a wall surface or furniture set. Manufacturers offer different options for door stops, differing in design, shape and design. There are models designed for mounting to walls or floors. You can install this fittings yourself without calling a specialist.
Types of devices for limiting door opening
Homemade wood wedges or a stool for holding the door leaf are gradually becoming a thing of history. Today, manufacturers offer many special devices for these purposes.
Classification of limiters
The door stop refers to the fittings of the door block. But the doors, depending on the installation location (entrance or interior), the material of manufacture (metal, solid wood or frame structures) differ in size and weight. Accordingly, limiters are produced taking into account different door blocks.
Restrictive devices can perform different functions, sometimes even opposite ones. For example, there are simple stops that prevent the door leaf from hitting the wall surface. And there are more complex designs that allow you to protect your fingers in case of unexpected spontaneous closing of the door (for example, due to a draft).
Many consumers have little idea which stop is best for an interior door.
Therefore, before buying this element of fittings, it is recommended to understand what types of products are on the market and their purpose (functions):
- Chips - designed to soften the impact of the door leaf on furniture or a wall;
- Stops – limit the opening angle of the door. Some models of stops fix the sash when they touch;
- A closer is a limiting mechanism that is often installed on entrance doors. It ensures smooth movement of the blade when closing. There are models that allow you to fix the sash in the open position;
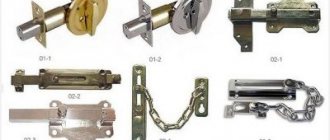
- Stoppers – rigidly fix the door leaf at a certain point. One of the options for such accessories is a standard chain;
- A latch is a type of closure device. This device fixes the door leaf in the closed position;
- Pads – prevent the door leaf from slamming. The door does not close completely; there is a small gap between the door leaf and the jamb.
All of the listed products, despite their design and functional differences, are divided into 3 main categories according to installation method:
- Sex restraints;
- Wall fixtures;
- Products installed directly on the door block.
Adjusting the locking mechanisms
The initial stage is disassembling the device. It will depend on the design features whether it will be necessary to dismantle the linings, locking mechanisms and remove the handles. The main method of adjustment and correction will be determined by the symptoms of malfunctions.
If the door lock is jammed, lubricate the latches with machine oil or grease. When lubricating, rotate them so that the liquid spreads throughout all the insides of the mechanism.
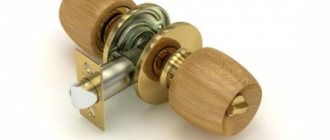
If the lock has a short hidden tongue, then there are adjustments for the extension of the tongue, which is built inside the handle. You can adjust the reach by rotating a screwdriver in a special groove. This applies to both the locking mechanism tongue and the handle tongue.
Installation of floor limiter
Devices for limiting door movement mounted on the floor base can be soft or hard. When it comes into contact with a soft product, the canvas is pushed back in the opposite direction without any damage.
Manufacturers offer self-adhesive floor stops for wooden interior or plastic balcony doors.
When installing a hard stop, the door should open smoothly, since if there are strong impacts against a hard stop, the door material will be deformed.
Tools required for installation work:
- Simple pencil;
- Screwdriver (screwdriver);
- Hammer;
- Screws and dowels (most often they are included in the delivery of accessories).
The sequence of installing the door stop on the floor:
- Selecting the installation location of the limiting device. To do this, you need to open the canvas and fix it a few centimeters from the wall plane. In this case, the door handle should also not come into contact with the wall. If the door block is located in the opening of a passage room through which people often walk, it is recommended to mount the stopper as close to the wall as possible;
- The floor stop must be fixed closer to the edge or approximately in the middle of the interior door. If the device is placed close to the jamb of the door block, then when the door leaf hits, a high load will be transferred to the hinges, and accordingly they will quickly fail. It is important that the limiter does not interfere with your feet, since hitting it can break your finger;
- After selecting the location of the fitting element, markings are applied to the floor base with a simple pencil. The doors are closed;
- Using a hammer drill, drill 2 holes: for the pin and dowel;
- A dowel is inserted into one of the holes made and a limiter is installed. It is necessary to ensure that the pin fits into the second hole;
- A screw is screwed into the dowel through the stop;
- Open the door to check that the limiting device is properly secured.
It is not recommended to install a door opening limiter on the floor if the room has a laminated flooring. The emphasis will tie the laminate to the flooring, and with temperature changes and changes in humidity, swelling of the material or divergence of the connecting seams may occur.
Conclusion
As you can see, mistakes can be made at every step when installing interior doors yourself. As a result, the door will look unkempt; it will open spontaneously or touch the floor. And with all this, the work will take a lot of time, effort and nerves, and if the installation was ordered by shabatniks, then also money. And you will still have to pay professional craftsmen for the rework, and maybe even buy damaged moldings.
Is there any point in wasting time and driving yourself into additional expenses if everything can be created perfectly and perfectly right away? Masters are always at your service. In addition, the prices for interior doors will pleasantly surprise you. Call!
Wall Mounting
The wall stop has 2 parts:
- Pin with heel;
- Soft washer.
The pin is fixed on the wall surface, and the washer is fixed directly to the door leaf. It weakens the impact of the blade on the pin.
Silicone wall stops are considered universal for interior doors. They can be used for different models of door blocks, regardless of the floor covering used in the premises.
Wall-type stoppers differ exclusively in the material of manufacture. Most products are made from metal, after which they are coated with wood, polyvinyl chloride, non-ferrous metal spraying or chrome. Most models are additionally equipped with a magnet or vacuum suction cup. This makes it possible to lock the doors when open.
The technique of installing wall fixtures is not difficult for you to do the work yourself without calling a specialist. Installation involves precise alignment of 2 elements of the door stop.
First, the installation location for the fittings is selected. After this, the pin is first fixed into the wall. Using a hammer drill, holes are drilled in the base for the dowels, then self-tapping screws are screwed into them through the pin.
Next, the mating part of the locking device is put on the pin, the blade is opened all the way and the location of the second element of the limiter is marked with a pencil on its surface. Make holes and fix the part with self-tapping screws.
When choosing this type of door hardware, it is recommended to take into account that the service life of the product depends to a large extent on the material of manufacture. Models made from high-strength raw materials are more expensive.
Master's choice
Door installation begins with choosing a specialist. It is important not to make a mistake, because the final result of the work depends only on his professionalism. Is it possible to find an experienced specialist through an advertisement in a newspaper? Maybe, but, usually, a good master is constantly busy with work and does not need additional advertising of his own services. One of the most common mistakes is that the client chooses a craftsman based on his ability to talk extensively about the various intricacies of carpentry. Sweet speech will not change skill. Often amateurishness is hidden behind laudable odes to oneself, but the most ideal thing about a master is his work.
Making a door stop with your own hands
If you wish, you can make a door stop yourself. The construction of a soft restrictive device is based on the manufacture of a small pupa (tilde) and a filler. To increase the weight of a homemade interior door stop, you will need sand or small pebbles.
The door stop is located on the handle on the opening side of the door leaf. The locking device must have a loop. Everyone determines the color and design of the tilde at their own discretion. Ready-made patterns can be found on the Internet or in magazines.
To make the device you will need the following consumables:
- Pin;
- Textile;
- Threads matching the color of the fabric;
- Soft filler, for example, synthetic winterizer.
First of all, you need to focus on the volume of the tilde. It should be enough to soften the impact of the blade when opening. Each individual element is cut out in 2 copies. The cut blanks are stitched together, leaving a small section unsewn to fill the volume with filler. Next, you need to unscrew the components of the future interior door stop, fill them with padding polyester or other soft material, and completely sew them up. The homemade door travel stop is ready, all that remains is to install it on the door structure.
Poor closing
Poor or loose closing of interior doors can be caused by the following factors:
- The skew of the door frame is due to improper connection of the beams. Eliminated by more tightly fastening all components of the box using screws. To do this, the box must first be dismantled;
- Insufficient deepening of the hinges into the box is eliminated by tightening the screws securing the hinges. If this does not help, you need to remove the box and deepen the niches for the hinges;
- Excessive deepening of the hinges in the door can be solved by loosening their fasteners.
This work is simple, but it requires certain skills in handling a screwdriver for tightening screws, a plumb line for determining the verticality of the surface, a hammer, a chisel and a plane for deepening the niches of the hinges. The video shows in detail how to adjust an interior door with hinges.
Care and operation
To reduce the risk of the problems described above, experts recommend:
- Frequently adjust and maintain fittings - lubricate hinges, handles and locking mechanisms.
- Pay attention to rooms with high humidity - bathroom, kitchen and toilet. The risk of drying out and swelling is much higher there. It is necessary to renew the coating of products more often, pre-treating them with an antiseptic composition.
- Monitor the position of the door leaf and periodically adjust it to reduce the risk of the door sagging and reduce the load on the fittings.
- Avoid saving on components. High-quality parts and fittings will help increase the service life of the door structure.
- Adjust room ventilation by installing forced fans or special air dehumidifiers.
- Avoid strong impacts on doors and components to avoid damaging the product.
- When caring for doors, use only special products, strictly following the manufacturers' instructions.
- Do not allow the surface of the structure to come into contact with chemically active substances - gasoline, acid, acetone, alcohol and alkali.
Operating procedure
- Determine the location of the problem. These can be hinges, a box, a canvas or a lock (latch). If the problem is related to the opening of the sash, then it is better to check the verticality of the elements with a plumb line. The tightness of the interior fabric is easily determined using a sheet of paper, which must be placed between the sash and the frame at the moment of closing.
- Prepare the faulty area for repair. In some cases, this requires opening access to the hinges by removing the canvas. Often the box is skewed relative to the wall. In this situation, it is necessary to dismantle it and then reinstall it.
- Eliminate the problem using the necessary tools and equipment.
Setting up locks and handles
Adjustment of locks and handles is required in two cases.
- The lock is not seated tightly in the socket.
- The lock escutcheon touches the narthex.
The first problem can be eliminated by tightening the screws or installing a gasket in the space between the lock and the socket.
The second problem can be easily solved by deepening the groove under the latch or lock.
