What is a door frame?
So what is a box?
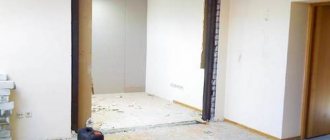
Go to any door now and open it. Look where the hinges are attached, this is the frame on which the door leaf is installed. This is the first thing that is installed in the doorway. Secure and level. If the frame is installed crookedly, then the door will subsequently open at an angle, quickly sag, begin to creak, and the fittings will not work correctly. In general, it is clear that the frame is an important element of the door structure. Materials used for manufacturing: solid wood, MDF, plastic, aluminum, metal. All that remains is to choose.
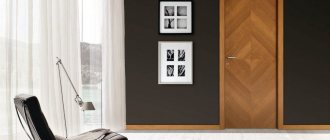
There are different options for installing the box. She may be invisible. To do this, use an aluminum box and mount it directly into the wall, and decorate the top in the color of the walls. There are also options with a built-in groove. In order to install additional trims and platbands in them in the future.
The box is installed on three or four sides of the opening. It is recommended to use the latter option in the bathroom. For greater sealing of the room. In other rooms, the box is installed on the sides and top. And from below there remains a gap between the floor and the door.
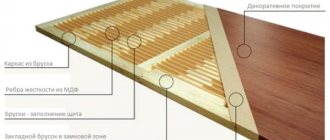
Door frame layout diagram
Door frame complete set:
- Extensions (needed if the opening depth is more than 75 mm)
- Platbands (telescopic and stuffed)
- Sealant
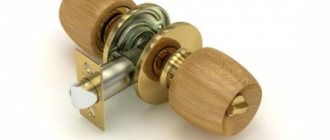
- Fittings (overlay and mortise)
Assembly rules and tips
If the dimensions of the opening and the dimensions of the tray itself have been determined correctly, there should be no problems with the assembly and installation of the structure. If the structure is purchased as a complete set, then the entire installation process will consist only of installing the assembled elements into the opening and fixing them. Fastening on your own will take place in several stages:
- The structure needs to be assembled, all dimensions rechecked and possible inaccuracies eliminated.
- Holes for fastenings are made in the sections of the tray adjacent to the wall surfaces.
- The gap between the door leaf and the frame is checked.
- The perpendicularity of the installation of the box is checked using a plumb line.
It is necessary to check the perpendicularity, since in its absence the door can open on its own.
Next, the box is installed, fixed, and the existing gaps are filled with polyurethane foam.
Standard size range
The door opening is basically always the same. Therefore, there is a standard range of door sizes. This approach is convenient for the client because the standard is always available. And after purchasing, you won’t have to wait long for the doors to be delivered and installed.
The calculation of dimensions is simple - the door width is 100 mm less than the opening, and the height is 50 mm. Let's say the door opening is 2050*700. Accordingly, the door configuration you need is 2000*600.
The standard door height is always 2000 mm.
Standard width: 550, 600, 700, 800, 900 mm.
The depth of the box is usually 75 mm. But often the depth of the opening is greater. In order to beautifully decorate the remaining space, add extras to match the color of the box. In this case, the door itself and the composition as a whole look harmonious and complete.
Standard sizes of different rooms
Algorithm for measuring the size of a doorway
To correctly measure the size of the opening, you must follow the following sequence of actions:
- Measure the height from the floor to the top (if the opening is not level, you need to measure in the narrowing area), to the middle of the casing.
- Width – from the middle of the left to the middle of the right casing (taking into account the narrowing).
- Depth is measured at the top, middle and bottom (to find the widest measurement).
A positive result depends on the accuracy of the measurements.
Standard doorway calculation table:
| Width cm | Height cm | Room view | Standard |
| 62 — 65 | 195 — 197 | Toilet, bath | 55*190 |
| 67 – 70 | 195 — 197 | Toilet, bath | 60*190 |
| 67 — 70 | 205 — 207 | Toilet, bath | 60*200 |
| 77 – 80 | 205 — 207 | Kitchen | 70*200 |
| 87 – 90 | 205 — 207 | Room | 80*200 |
| 97 – 100 | 205 — 207 | Room | 90*200 |
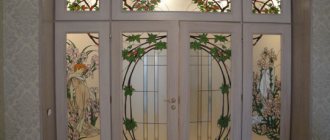
| 127 — 130 | 205 — 207 | Living room (double doors) | 2*60*200 |
Box type
The type of box does not affect the design in general, but determines the appearance of the entire package. Together with additions and platbands.
- Simple type
Everyone is familiar with this type. Previously, all the boxes were just like this. They differ in that the platbands are attached to them with nails or studs. And these are visible fastenings. They can only be decorated with plugs.
- Telescopic type
This design is more difficult to manufacture. And installing it is a pleasure. The manufacturer prepared in advance all the grooves in the box and the corresponding protruding parts in cash. As a result, you assemble such a box like a puzzle. All fastenings are invisible and neat.
- Monoblock
This type is very similar to the telescopic one. The difference is that in production they make cuts at 45*. And all you have to do is install this structure in the doorway. Note. This type is suitable if you have a smooth opening and walls.
Using Radio Devices
Attention! Radio devices can only be those manufactured under the ZONT brand.
These are radio thermometers, radio leakage sensors, radio motion sensors and radio key fobs. They can be used with a thermostat only if the ZONT ML-489 Radio Module is connected to Input 2 of the thermostat (not included in the delivery package and must be purchased separately).
Registration of radio devices is carried out from the personal account of the Internet service, setting up the Radio device
Radio module ML-489 Thermostat ZONT
Pink wire Input No2:
Black wire
“-” of the main power Red wire “+” of the main power
Registration of radio thermometers, radio leakage and motion sensors:
Open the housing of the sensor to be registered and find the registration mode enable button on the board.
In the Internet service settings, click the “Add devices” button. From this moment on, the time allocated for sensor registration will begin. Registration is available in 3 minutes.
Press and hold the button on the board of the registered sensor until the LED lights up.
The registered sensor should appear in the radio menu.
Registration of radio key fobs:
In the Internet service settings, click the “Add devices” button. From this moment on, the time allotted for registering a new key fob will begin. Registration is available in 3 minutes.
Simultaneously press and hold down both buttons to turn on and off the security mode (image of an open and closed lock). Successful registration is indicated by a short-term (~ 1 second) lighting of the LED on the key fob body.
Registered radio key fobs should appear in the radio device menu.
Installation designs
- U-shaped or wraparound
From the name it is clear that it covers the opening on three sides. Includes frame, extensions and door frames. The box comes complete with a gasket for sealing.
- End
This box is installed using a special technology on drywall. Installation is carried out on the frame that comes with the kit.
- Corner
In this design, the box and cash are one element. This element with the letter G decorates each corner of the opening.
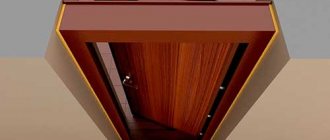
Separately, we note the secret installation box. The box is hidden in the wall along with the hinges. The entire block is made of aluminum and comes in two types:
- To order
The box is made exactly to the size of your opening in the options of painting or film lining.
- For painting
The box comes pre-painted. Under production conditions, all necessary grinding and priming operations have already been completed. All you have to do is decorate them in the color of the interior.
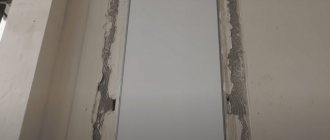
How to sheathe with plasterboard?
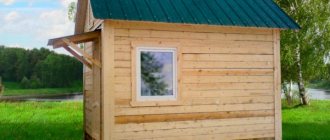
If, instead of a classic concrete opening with a box installed in it, you want to make a wall with a plasterboard arch, then you have chosen a simpler path. Sheathing with plasterboard is one of the most effective solutions, despite the ease of implementation.
From plasterboard you can create unusual fantasy structures that are absolutely safe for the overall stability of the entire building. Openings with plasterboard lining can have tables, columns or even a bar counter.
In any case, the plating is performed as follows:
- To begin with, all measurements are taken from the opening: width, height, wall thickness.
- Next, the parts are cut out from plasterboard. For rectangular cladding, simply cut out the strips, but for arched cladding, they need to be slightly cut with metal scissors, wetted and given the desired shape. After drying the part in a bent form, you will be able to make the necessary element.
- To glue drywall parts, use ordinary putty. After the elements are attached, the joints must be additionally puttied and leveled using aluminum or plastic profiles.
- Afterwards it is necessary to prime the entire surface. After complete drying, you need to carefully putty the uneven places and rub them until smooth.
Materials
Boxes are made from different materials. Let's look at each of them in detail.
- Solid wood
The most budget and affordable option in this category is solid pine. It is sold in its pure form. And during installation it is necessary to carry out several additional operations. Cover with antiseptic and varnish. If the box is, say, made of solid oak, then it is completely ready for installation and operation.
- MDF (fine fraction)
The most popular material. You don’t even have to know that the base of the box is MDF. You will recognize this material by its cladding. Films, eco-veneer, ABS plastic. All these external materials are MDF based.
- Aluminum
Used for invisible doors or glass doors. Comes complete with seal and corners for connection.
Peculiarities
The majority of doors are made standard, but it is important to take into account that there are no clearly prescribed frame sizes for interior passages. It is recommended to select the box in such a way that the entire structure can fit harmoniously into the opening. In terms of height and width, it is recommended to take a set slightly (within three centimeters) inferior to the opening.
The largest standard box size in width is 90 centimeters , but such a model can not be found in the catalog of every manufacturer. Indeed, in multi-storey and modern private houses, openings of a suitable size are very rare. The widest doors can be found in “Stalinist” buildings, as well as in large office centers.
Door frames and leaves produced abroad are made to completely different standards, so you need to choose them carefully!
Frames for doors that do not have thresholds are made in the shape of the letter U, from a pair of wooden posts connected at the top by a crossbar. The advantage of such solutions is their compatibility with sashes of very different heights and their low cost. Rectangular frames, which initially have a threshold, are needed by those who want to install the entire structure as simply and quickly as possible. It is recommended to choose telescopic platbands , because products with them will be easier to rearrange during a major overhaul.
We count the number of all elements
All necessary equipment will be calculated for you in the salon upon purchase or preliminary cost calculation. But in order to orient you, we will tell you the number of elements in the standard configuration.
Elements such as additions and cashing are sold in strips of 2200 mm. Therefore, if you order one door, the package will be as follows: trim - 5 pcs (on both sides), frame - 3 pcs, hinges - 2 pcs, handle - 1 pc, locks and linings as desired.
If you order several doors, then the number of boxes will be calculated at 2.5 pieces per door. The point is that the moldings of the box and platbands are sold only in whole sticks and no one at the factory will saw off half.
It is always recommended to install doors with a threshold in the bathroom. This means that the door frame will be on all 4 sides.
If the depth of the door opening is more than 75 mm, include additions in the calculation. They are also sold by molding and come in different widths.
Opening dimensions
In most houses, the dimensions of doorways are standard and are designed to accommodate the installation of the same standard doors. The height will be from 1940 to 2050 mm. The width depends on the purpose of the room into which the doorway leads; narrow doors, 630 mm wide, to the toilet and bathtub, and wide doors - 1600 mm - to the living room.
It is important to take measurements correctly using the simplest technology:
- First, the old door is completely dismantled, along with the door.
- The opening is cleaned to remove the putty, and the wall structure is opened.
- The parameters are measured.
Measurements of width and thickness are taken in three places: at the top, near the floor and in the middle. To achieve the greatest accuracy, it is recommended to measure using a level - this will allow you to take measurements parallel to the ground.
If it is necessary to urgently measure a doorway, only dismantle the trim and see an open wall suitable for measurements.