Artificial stone has now become so popular and in demand that many people seek to purchase it for finishing brick or block masonry. What to do if you have a desire to have an artificial stone, but don’t have enough money to buy it?
Today you can use special molds for making artificial stone, which will allow you to create the material yourself and save money.
Today, folk craftsmen have already learned to make various types of artificial stone shapes: rectangular, square, diamond-shaped, corner . The material can be wood, polyurethane or silicone.
Where can artificial decorative stone be used, and what materials are needed to make it?
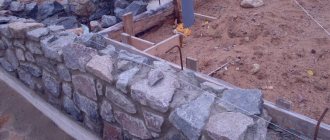
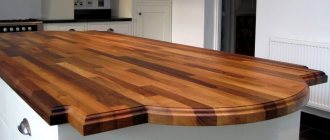
High-quality, hand-made artificial stone can decorate building facades and fences. They can be used to lay out paths or be used as indoor decoration. If you decide to use artificial stone for indoor decoration, you can use plaster or acrylic.
If the stone is needed for external work, then cement mortar is better suited . It is not afraid of moisture, so the destructive impact of the environment on it is minimal.
Considering that an artificial stone made by hand must be durable and economical, sand, fine crushed stone, and marble chips are added to the composition.
To make the finished product as durable as possible, a special microfiber - fiber fiber - can be added. To increase density and reduce the amount of water in the solution, a plasticizer is also used.
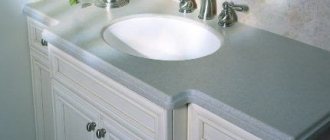
If there is a need to produce artificial decorative stone of large sizes, it is better to use acrylic as a material. This material has always been highly resistant to mechanical damage, it does not wear off and retains its original qualities for a long time.
Acrylic stone can be made at home within 3 hours . The components taken are acrylic resin - 25%, hardener from 2 to 4%, composite material - 70%, pigment additives, if a certain color is required.
All components are thoroughly mixed using a mixer and poured into molds. For acrylic, you need to use forms made of glass, polyurethane, metal - these are the surfaces to which the resin does not stick.
The optimal temperature for hardening is 25 degrees Celsius.
Matrix manufacturing
In the process of casting finished elements, the most difficult and crucial moment is the manufacture of the matrix. In the narrow sense, a matrix for making silicone or polyurethane molds is a platform on which templates are laid out and filled with material for making molds.
There are no special requirements for the size of the matrix; it all depends on what type of tile will be cast. Most often, 20 mm thick chipboard is used as the main base material; in addition to the slab, you can take multi-layer plywood. Well, for the production of molds on an industrial scale, you can also use metal sheets with a thickness of 6-8 mm.
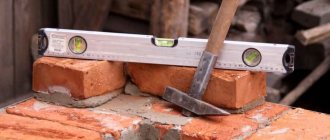
In a budget option, it is enough to have a chipboard measuring 60x60 cm. The main thing is that the surface on which the casting will be carried out is as even and smooth as possible, and that the sheet itself is rigid and durable.
On the front side of the matrix, the internal field is marked for master models and places where the sides will be installed. For the sides, wooden planks of the same thickness are usually used; simply screw them to the base with self-tapping screws.
Advice: in order for the form to be durable and last a long time, it is recommended to take the height of the sides 10-12 mm higher than the highest point of the master models.
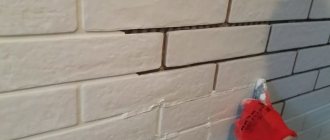
After marking the sides, they are cut and adjusted to each other so that there are no gaps in the corners. The sides are screwed using 4-5 screws on each side. It is recommended to additionally seal the joint with the chipboard with construction silicone before fixing the sides. After drying, excess glue is removed.
Advice from experts
- All stages of production must be carried out very carefully.
- It is important to carefully monitor the proportions of the components used.
- There is no need to rush to remove the finished stone from the molds. It is better to let it sit for a few extra hours so that it hardens well.
- You need to use only high-quality raw materials to ensure that the products are strong and durable.
Making molds for artificial stone yourself will save a decent amount of money. The process is quite simple and anyone can easily handle it.
Preparation of master models
Ready-made decorative materials with an interesting texture, natural materials, or hand-made models can be used as master models. When making models yourself, plaster, wood, plastic, or even papier-mâché models can be used as the starting material. But among all the listed materials, the best models are made from gypsum.
Preparing models begins with cleaning their front surface. When pouring silicone or polyurethane, the front part of the model should be:
- as smooth as possible;
- without visible flaws - craters from previous fillings, sagging and roughness;
- there should be no cracks or chips;
- the surface must be cleaned of dust and dirt.
In addition to the front surface, its reverse side is also prepared - cleared of sagging and, if possible, leveled.
Fake diamond
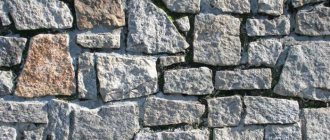
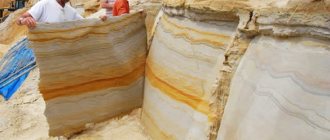
Natural building materials have always been expensive. This is primarily due to their extraction and transportation. Enterprising building materials traders one day solved this problem by replacing stone with samples of similar sizes and textures made from building mixtures.
Artificial stone is produced by pouring gypsum or cement-based solutions into certain forms. Frozen samples are painted to give them the color of natural material. In terms of its physical properties, artificial stone is in no way inferior to natural stone, and in some cases even surpasses it. And believe me, even a professional often cannot distinguish them visually.
Gluing master models
The gluing process begins with laying out the models on the working surface of the matrix. Inside the sides, the models are first laid out, aligned, and only after the correct layout has been achieved does the gluing process begin.
Strong fixation of the models on the working surface is necessary so that when pouring the mold with polyurethane, silicone or even plaster, the models cannot move. The second point is the need to close all the gaps between the matrix and the models so that the casting of the mold turns out to be of high quality and does not require further modification.
Gluing is carried out using the same silicone sealant; it is applied to the back side of the master model, and after drying, the excess is removed using a scalpel or a painting knife.
Types of forms
Typically, reusable molds made of plastic materials are used to cast decorative stone. True, this does not prevent the use of rigid matrices made of plastic or wood. Or short-lived rigid forms made of plaster.
Each type of material has its own advantages and disadvantages. Silicone molds allow you to make from 100 to 300 castings. This is quite enough to recoup production. Polyurethane matrices have a longer service life; from 800 to 1000 castings can be formed. At the same time, polyurethane can also be used to work with a vibrating table.
Wooden molds are the simplest, but the quantity of finished products will be small, and the quality will be low. Gypsum is used for specific castings; they must have the correct geometric shapes so that after the concrete hardens they can be easily separated from the mold.
Making molds from polyurethane
The prepared master models are covered with two layers of grease. To do this, you can use Vaseline or a special release agent. The polyurethane mass is stirred and a hardener is added. When the mass reaches the consistency of liquid sour cream, it is carefully poured into the middle of the matrix and distributed evenly throughout the entire volume.
Important! Filling must be done on a horizontal surface. To do this, the matrix is leveled before pouring.
After pouring, use a wide spatula to level the fill. To speed up drying, it is recommended to slightly heat the surface with a hair dryer. After the polyurethane has dried, first remove the sides from the base, and only then remove the resulting casting.
Making a mold from silicone
Although silicone molds are inferior in strength to polyurethane ones, they allow you to get the same clear prints. The manufacturing technology is similar to polyurethane casting - the matrix is treated with a release solution. It is recommended to do this twice with an interval of 5-7 minutes. After this, a solution for filling is prepared. The jelly-like mass is evenly distributed over the surface and left to dry.
The finished template is removed after the silicone has completely hardened. To do this, carefully remove the sides and, after trimming the edges of the form, it is removed from the matrix without effort.
Matrix made of wood
The wood matrix is made from a material that has a pronounced fiber structure. In principle, in order to obtain a casting with a characteristic “wild” natural arrangement of the wood structure, it is best to use old boards. Before hammering out the matrix, the side facing inward is treated with sandpaper. This is necessary in order to remove roughness from the fibers. The sides are fastened with self-tapping screws. From the inside, the cracks are treated with silicone, and after drying, with a grease lubricant.
Application of plastic
When using plastic, industrial equipment is usually required. The fact is that plastic molds are made by injection molding plastic. In this case, the temperature of the plastic can reach 300 degrees. At home, it is unsafe to reach such a temperature for 1-2 kg of molten mass of plastic. True, there is an option to simply glue a mold from strips of plastic or dissolve the plastic in acetone and, while it is soft, fill the matrix with this mass.
Plaster molds
Gypsum is a very strong, yet fragile material in its structure. It is rational to make molds from plaster for one product. This will make it easier to cast and remove the finished model from the mold. In this case, in case of failure, only the form for one element will crack, and not for several.
The work has the same sequence as for other materials. Only the casting is done for one model, and the pouring solution is done very quickly. Gypsum sets and hardens very quickly.
How to use a stencil correctly
Having made it yourself or bought a ready-made stencil, it is used to decorate the walls. The templates are used as follows:
- Decorative plaster and one side of the stencil are covered with aerosol glue. The template is applied to the wall until it fully adheres to it.
- As soon as the stencil adheres to the wall, a layer of decorative plaster is applied with a spatula. The strokes are made strong to create a “bas-relief” and give the plaster density.
- The template is completely hidden under decorative plaster.
- Once the solution is completely dry, carefully remove the stencil.
- To create a three-dimensional effect, several layers of plaster are applied.
- If the picture is destroyed after removing the stencil, it is corrected with sandpaper.
To give the design shine or the desired shade, it is coated with a decorative color.
Important! When working with glue, it is important to hold your breath or use a mask to prevent sprayed chemicals from entering your respiratory tract.
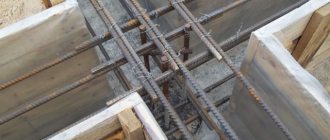
Filling with mortar
Before the first pouring of concrete, the inner surface of the template, as well as the matrix, is treated with a grease or separator. The form is pre-installed on a rigid, level base.
The filling solution is thoroughly mixed; it should be mobile, but not liquid. Pouring into silicone and other forms is done in the center, and then leveled along the edges. It is recommended to remove excess solution with a spatula after completely filling the template.
The form cannot be moved until it is completely dry.
What happened and how much money did it cost?
After the concrete solution has dried, and this is 4-5 days, when the concrete has had time to dry under natural conditions, a sheet of plywood or metal is placed on the form and the form is turned over.
After this, the silicone or polyurethane part is carefully separated from the surface and the finished castings can be processed further - cleaned, washed, folded, painted with water-soluble paints. Calculating costs shows that with the cost of a finished mold made of polyurethane at 2500-2750 rubles, independent production will cost 2000-2200 rubles. This amount includes the purchase of self-tapping screws, technical silicone, and polyurethane composition.