How to make a snow scraper with your own hands
In winter, snow drifts interfere with normal movement.
As a result of snowfalls, the surface of yards and lawns is completely covered. This reason should force us to take care of the timely removal of snow, not only for the sake of order, but also for the safety of movement.
In order to prevent snowdrifts, roads need to be cleaned in a timely manner. Cleaning snow is a difficult and tedious job, but if you have convenient and effective equipment, this process can be significantly speeded up.
Currently, the domestic market offers a wide variety of winter equipment for snow removal. But we will tell you how to make different types of scrapers for snow removal with your own hands.
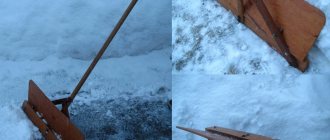
Manual snow scraper
The peculiarity of the manual scraper is its ease of use, as well as the low material waste when creating the scraper.
A hand scraper is indispensable for clearing areas of ice, but the runners will have to be pulled with difficulty along the sidewalk and ground. Therefore, it is better to make a manual scraper on wheels.
Let's look at the main stages of creating a manual scraper for removing snow on wheels:
1. To create a scraper blade, we need a pipe with a diameter of 27 cm, then we cut out a sector from it. As a result, we get the required blade.
2. Use an unwanted baby stroller to create a frame
3. We make stops using unnecessary water pipes. We create slots for the wheel axles in the pipes on one side, and weld them to the scraper blade on the other.
4. Take metal corners and create ears for fastening the racks.
5. To control the height of the handle, we make three holes in the upper part of the racks.
6. In order not to spoil the asphalt, you can install a protective conveyor belt to the lower parts of the blade. We paint the scraper.
Result: the scraper is very easy to use and cleans snow quickly and conveniently. Thanks to the conveyor belt, the asphalt and concrete surface are not scratched.
Snow scraper brush
A snow scraper brush is one of the most versatile tools. Its configuration can be different, the main thing is that it fits comfortably in the hand.
What to make brush bristles from. Often, artificial bristles, similar to thick fishing line, are used for brushes.
You can, of course, make a brush from natural bristles, but then you will have to be generous financially. The stiffness of the brush will depend on the task at hand.
The scraper should not be heavy in weight, otherwise your hands will get tired quickly. Therefore, when creating a scraper, pay attention to its weight, since this is one of the main characteristics.
Plastic snow scrapers
The advantage of a plastic scraper over others is that snow practically does not stick to it and it is much lighter in weight, so working with it is much easier.
A plastic scraper, like other types of scrapers, can be created in any size. A small scraper can only be used for ice, but a wide one can clear most of the area.
A plastic scraper is suitable for clearing snow from not only roads, but also roofs.
Metal scraper for snow removal
Steps to create a metal snow scraper:
1. We take a metal sheet measuring 1500x800 mm, a 3-meter pipe for the handle, as well as 2 parts of a metal angle, 1 m long, for future runners.
2. Bend the tips of the runners and attach the handle. At a distance of a couple of millimeters in front of the posts, we install 2 pins, then attach the sheet to them.
3. Firmly install the upper part of the scraper using clamps.
Clamps will help control the height and are able to secure the side panel.
By the way, the scraper can be made foldable if there is a need to transport it in transport.
With the help of a special tool like a scraper, snow removal becomes better and faster.
A homemade snow scraper is not complicated in its design, and making it will not be difficult.
And also you can watch the snow scraper video
Even though the world is experiencing global warming, winters remain very harsh and snowy in most parts of our country.
It is the latter factor that constantly impedes not only the movement of motor vehicles, but even ordinary pedestrians. In many ways, this issue is more relevant for citizens who have country houses or dachas, because there they have to clear the snow themselves, and not rely on public services.
Of course, some people can afford to buy special small snow blowers, but most people cannot afford it. This is why a snow scraper has been and continues to be a very necessary tool.
Lever Application
However, the design discussed above has one, but very significant, drawback - it is impossible for them to throw snow. This problem can be solved by equipping the handle itself with wheels . The advantage of this device is that you can use large diameter wheels - this will make movement easier. Some models consist of one wheel, but for greater convenience and stability, you can use three or four.
In this case, the handle is a lever, which allows you not only to transport snow, but also to throw it away. The easiest way is to use two wheels on an axle. The handle is attached to the rod with clamps. Before attaching, a bearing is put on it. This makes it possible to rotate the scraper. Since the work will be done in winter, the bearing must be lubricated with winter grease, otherwise it will not work. If the handle is T-shaped, this will also make the design more convenient.
Criterias of choice
Modern options for snow scrapers can be very diverse. For example, there are manual options and there are mechanical ones. Moreover, the former are much cheaper.
However, all dump models share certain properties:
- ease;
- strength;
- They have a high quality handle.
The latter should not slip in the hand and have poor thermal conductivity, which is justified by the need to keep the hands of the person using it warm.
It follows from this that the choice of the required scraper option for clearing snow should be based on the specified properties.
This is necessary to ensure that the device is lightweight, but at the same time durable. Due to this, the person who uses the scraper will be less tired, and the chance that the device will break is minimal.
Using the Mole cultivator
Owners of vegetable gardens, small farms, and summer cottages who are planning to purchase a domestic motorized cultivator “Mole” (tested not only by time) are often interested in what attachments for this motor cultivator are sold on the domestic market.
Their interest is understandable and valid, because it is thanks to all kinds of trailed and mounted attachments that this unit becomes indispensable, one might say, a universal assistant on the site.
Wood scraper
To create scrapers with sides made of pine boards, it is necessary to prepare a rail from the same material.
Everyone makes the dimensions of the latter more convenient for themselves. You also need to take a sheet of galvanized iron so that its dimensions are 73 by 70 cm.
This version of the scraper is very simple to make. The sides made from boards need to be attached to the sheet of iron with screws (you can even use self-tapping screws). After this, the rail itself is attached, which will act as a handle.
Scraper on wheels
Naturally, it is better to use models on wheels. Using a scraper makes snow removal very easy.
To create this version of the device, it is necessary to prepare an aluminum pipe whose diameter is 27 cm.
After this, you need to cut out a sector from it, the size of which will be several centimeters smaller than the semicircle.
The resulting part is used as the blade itself.
The frame can be used from an old baby stroller. You will also need iron water pipes (you can use old ones).
Next you need to do the following:
- first, the cuts necessary to accommodate the wheel axle are made on the pipe, after which it must be welded directly to the blade on the opposite side;
- using metal corners, it is necessary to make fasteners for the racks;
- To protect the metal from possible corrosion, it must be painted.
The result is a very convenient and functional device that will not scratch the road surface when used.
In more advanced models, you can install a slider on the wheels to make the snow pusher even more convenient to use.
Watch the video in which the master clearly shows how to make a simple and reliable snow scraper yourself:
In winter, it is important to remove snow immediately while it is still loose. Scattering it with a shovel is unproductive, and it is also impossible to capture a lot of snow at one time. Based on this, many people are thinking about purchasing a scraper. However, in the store these devices are presented in only one size. They may be too big for some and too small for others. If you make your own snow scraper, you can create a device that fits the size.
Necessary materials
To make a full-fledged snow blower from a cultivator, you should select all the materials and tools from the following list:
- Keys of various diameters.
- Bolts and nuts.
- Drill.
- Bulgarian.
- Several screwdrivers of different diameters.
- Hammer and file.
- Pliers and vice.
- A hacksaw powered by electricity.
- Various chains.
- Welding machine.
- Metal sheet (roofing iron).
- Profile pipes of several varieties in size.
- Plywood.
- Conveyer belt.
- Metal corners.
- Closed bearings.
If you do not have so many necessary tools, then we suggest you assemble a lightweight version, namely a manual snow blower with your own hands.
Snow removal equipment
The structure of snow varies. The tool used should also be different. For example, loose snow requires a large scraper so that you can grab as much snow as possible. For hard snow, you need a more durable tool that can roll on the surface. Wet snow will slide off a plastic or metal surface more easily. In addition to scrapers or scrapers, dumps and pushers can also be used.
The simplest device is a piece of plywood . The height is selected according to the user’s height, but the sheet is placed not vertically, but at an angle of 60°. The width also depends on the person’s build. The wider the sheet, the stronger the plywood must be - therefore, the weight of the sheet increases. The advantages of such a device are its low cost, minimal preparation and a small number of tools for manufacturing - a hacksaw, ruler and pencil are enough. However, such a device looks unaesthetic and is inconvenient to use.
Another device is a pusher. It is a rectangular plate, perpendicular to which the handle is attached. This is a more convenient means for shoveling snow, and can also compact the path. In rural areas, this is done so that the crust and the path are at the same level - then the snow does not linger and the path remains almost clear.
This scraper is more convenient for work. To make it, you need to drill a hole for the handle in the middle of the wooden plate. For strength, you can fix the handle with additional stops, which will push it and the plate apart.
Rating of the best models from famous manufacturers
| Manufacturer country | Rating models | |
| France | Pubert r0027 | RUR 24,990 |
| Monferme 26087M | 11,000 rub. | |
| Sweden | Husqvarna for R316T riders | 130,000 rub. |
| STIGA ST 3146 P | 19,000 rub. | |
| Denmark | Texas ST1300 | 5,000 rub. |
| Texas Snow Buster 39 | 23,000 rub. | |
| Russia | Tselina SP56 | RUB 16,500 |
| SMB-1m | RUB 16,300 | |
| ZiD SM-2 | RUB 15,900 | |
| Mobile K SM-0.6 Megalodon | RUB 16,300 | |
| KADVI SP-56 | 18,000 rub. | |
| Belarus | SN-1m | 35,000 rub. |
Snow blower Mobile K SM-0.6 for walk-behind tractor "MB", "MKM"
Designed for clearing snow cover in small areas. A special reinforced auger allows you to remove compacted snow and ice. High-quality painting protects structural parts from corrosion. The working width reaches 60 cm, the height is 30 cm. Snow is thrown out at a distance of up to 10 m. The operating speed is 2–4 km/h.
Main advantages:
- adjustable ejection range;
- good grip height;
- toothed auger that copes well with crust and hard snow.
- all-metal body.
Minuses:
- control over fasteners and bolts is necessary.
Price: 16,230 rubles.
Mounted ZiD SM-1 for MB Favorit
The snow blower is designed for cleaning small areas. It is installed on the rear hitch of the Favorite walk-behind tractor, after which the steering wheel turns 180 degrees. Work is carried out in reverse gear. The width of the snow cover is up to 56 cm, the height is up to 17 cm. The snow is thrown at a distance of up to 5 m. The operating speed is 2–4 km/h.
Main advantages:
- metal case;
- high-quality paint coating;
- powerful engine;
- two-year warranty from the manufacturer.
Minuses:
- short ejection range.
Price: 13,250 rubles.
Pubert attachment for Vario series
Designed for clearing snow cover in small areas. Attaches to Pubert Vario walk-behind tractors. For installation, you need an R0083 adapter, which is not included in the package. The fence width reaches 66 cm, height – 25 cm. Snow is thrown out at a distance of up to 10 m. Operating speed is 2–4 km/h.
Making a homemade scraper
The main purpose of a scraper or snow shovel is to remove snow. If you modernize the scraper, you will get a quite convenient device. To make a homemade snow scraper, you will need to perform many steps with your own hands, which requires some knowledge and skills. First of all, you need to decide what material it will be made of:
With the onset of winter, owners of private territories have new concerns. They have to constantly clear the snow from the courtyard area. To make this difficult work more convenient, it doesn’t hurt to have a portable snow removal tool for such cases. Most often, owners use a manual snow scraper, which allows you to quickly clear sediment from adjacent areas, exterior items and roofs of houses.
Motorized option
Cleaning the yard and street in winter can be made easier if you make your own snow scraper using a walk-behind tractor. To do this, you don’t have to make any special efforts, since it’s enough to attach a snow removal blade made, for example, from a curved stainless steel sheet to the bumper. You can also use a ready-made blade. You can also install a snow blade on your bike by attaching it below the handlebars.
Snow shovels
Before you go to the store to buy a suitable tool, you should find out which manufacturers produce the highest quality and most reliable snow removal equipment. But to ensure that your snow shovel doesn’t disappoint, you need to look beyond the manufacturer. The ease of use of the purchased device largely depends on the size and material. If you wish, you can consider the option of making a snow shovel with your own hands, but in this case, you will first have to find out all the nuances regarding such devices.
In the design of a snow shovel, two main elements can be distinguished - a bucket for collecting snow and a handle. Sometimes in stores you can find models that are made using a larger number of parts. But even with such differences, similar instances are intended to perform the same function.
Traditionally, wood, plastic and metal are used to make snow shovels.
Made of plastic
The plastic used by manufacturers must be frost-resistant.
For some models, it is complemented by a metal edging on the bucket, which allows the product to more easily withstand mechanical loads and increases its service life. Plastic shovels are more convenient to use due to their light weight. This is an ideal solution for women and teenagers. At the production stage, the material is treated with chemical compounds, and the area near the handle with the bucket is protected with a special edging, which makes the product more wear-resistant.
They are most often chosen by those owners who want to save money. The main disadvantage of such devices is the fragility of the material. In addition, wood tolerates moisture much worse than plastic, which very quickly causes cracks to appear on the surface. Wooden snow shovels are best used for removing recently fallen snow. In order to easily cope with ice and wet precipitation, you will need to additionally equip the bucket with a metal edging, which will increase the service life of the tool.
Made of metal
These shovels are the most durable and therefore last longer than other snow removal tools. But they are also more expensive than other types, although this is not surprising, given their high level of performance. Metal shovels can easily handle not only snow, but also ice.
To reduce fatigue, you can purchase a tool made of aluminum or duralumin, which weighs less than steel products. Aluminum is lighter than wood, but still does not have the same amazing strength as metal shovels. In comparison, duralumin looks preferable, because this material is much stronger, although much heavier than ordinary aluminum. Steel shovels require considerable physical effort, so, as a rule, only men work with them.
When evaluating shovels by weight, you also need to pay attention to the handle. For more convenient work, the handle must correspond to the height of the owner. Cleaning the area with a short-handled shovel will be very tedious.
It is equally important that the bucket has the appropriate width. The wider it is, the more snow you can collect in it. But to remove wet sediment, it is best to purchase a small shovel.
It is most convenient to clear the courtyard area of snow using a three-sided model, since it allows you to retain all the collected light and loose snow. Its bucket has longitudinal ribs that increase the degree of its sliding over the surface.
When choosing a snow removal tool, you need to pay attention to the nature of the work and the individual load.
To ensure that snow clearing equipment can be transported in a car and conveniently stored, manufacturers produce special folding and collapsible models. There are solutions for children too - small shovels that will allow even little helpers to take part in joint cleaning.
Installation and operating rules
Before installing the snow blower on the walk-behind tractor, you must read the factory instructions. When operating, select the speed of movement, observe the adjustments of the guide visor so that the flying mass does not harm passers-by and the windows of buildings.
Before clearing snow, the attachments are attached to a special trailer unit on the frame of the traction unit. Algorithm of actions:
- If the trailer unit is made in the form of a bracket, you need to remove the pin, attach the attachment and insert it back. Secure the structure with bolts.
- Remove the pulley protection on the PTO. Use a V-belt to connect the PTO pulley and the pulley on the snow removal attachment. Create the required tension using the adjusting mechanism.
- Put on the protective cover and manually check that there is no friction by turning the mechanism.
- You can start working. Do not forget to periodically check the reliability of the coupling, since the safety of the person himself, as well as the performance of the unit, depends on this.
Making a shovel with your own hands
You don't have to spend money on buying a snow shovel.
If desired, each owner can make it himself, thereby saving not only money, but also time searching for a suitable model.
There are no particular difficulties in making a shovel for removing snow. Many owners of private territories have long been engaged in making wooden products with their own hands. But for those who are going to make a wooden snow shovel on their own for the first time, it wouldn’t hurt to first find out what materials will be needed for this work:
- nails and screws;
- wooden slats;
- strip of galvanized steel;
- plywood sheets 5 cm thick.
After preparing everything you need, you can proceed directly to assembling the tool:
- First you need to make a back wall, for which you will need a piece of plywood 4-5 cm wide. This part should be in the form of an arc and have a height in the center of no more than 8 cm, and in the area of the sidewalls it should narrow to 5 cm. For further fastening of the handle it is necessary to Make a cut in the middle with a bevel of about 1 cm.
- Now you need to attach the rail to the profile of the back wall and mark the place for cutting off the excess. In this case, the cutting will fit tightly into the cut.
- After the scoop is ready, it needs to be attached to the arc wall and secured with nails. Usually three nails are enough - one is driven exactly in the middle to the back wall, and the other two - on the sides. Be sure to inspect the bucket and make sure there are no gaps. Otherwise, during cleaning, stuck pieces of snow will be absorbed into the material, which as a result will very quickly deform.
- After making sure that the edge of the handle is closely adjacent to the plywood sheet, it must be secured with self-tapping screws.
- For the lower edge of the scoop, in order to strengthen the fixation at the junction of the handle with the back wall, you need to prepare steel strips of the required length. The finished strips are attached to the wood with self-tapping screws.
In order for the snow clearing tool to last a long time, it is advisable to make a bucket for it from stainless steel or galvanized metal.
To better understand how this will all look, you should take a closer look at the workflow:
- From a pre-prepared sheet of metal, you need to cut a square or rectangular workpiece, the thickness of which should be 0.7-1 mm.
- On one side of the sheet, through two opposite corners, you need to draw diagonal lines 5 cm long, and then make slits along them.
- The corners of the workpiece must be bent upward on three sides to form peculiar sides.
- In the resulting wall of the scoop, you need to cut a round hole corresponding to the diameter of the handle.
- The end of the wooden handle must be processed, giving it a slightly pointed shape. You need to make a metal holder for it, which is then attached to the middle of the bucket using self-tapping screws.
- The handle is driven through the side hole into the holder and fixed with self-tapping screws to secure the connection.
Scrapers for the garden
There are periods when there is more snow than usual, and you have to devote a lot of time to cleaning the area. It is not always possible to quickly cope with this task even with the help of a wide shovel. For such a case, it would not hurt the owners of private territories to have a scraper in their arsenal - a scraper for removing snow. In appearance, such a tool resembles a regular snow shovel, only with a wide bucket. With the help of this device, you can, without much effort, clear areas near your house and paths from snow masses.
Structurally, the scraper looks like a wide bucket for clearing snow with a large arched handle attached to it. Depending on the size, you can use this tool with two or four hands. Working together with a drag scraper allows you to clear an area of snow by moving large layers of snow.
But such devices can only be used for removing light snowfall. To remove compacted snow masses and areas of ice, you will have to use a shovel. Although for this case there is a good solution - a scraper on two or four wheels. With the help of such a shovel, you can clear the area of wet deposits without much effort.
Scrapers are similar to snow shovels in many respects. In particular, manufacturers use the same materials to make them.
Snow blower device
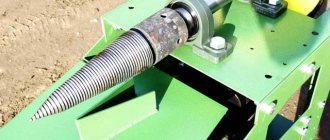
A mounted auger snow blower has a metal body with a shaft inside. The shaft has auger blades made of steel sheet of complex shape. The shaft is mounted in bearings, which allows it to rotate.
The rotor is visible inside. Above the rotor there is a rotary pipe. It can be turned in any direction. To attach an auger snow blower, there is a hitch, inside of which the power take-off shaft (PTO) of the walk-behind tractor is located.
Torque is transmitted to actuators. When the auger shaft rotates and moves forward, snow is captured by the blades and moves from the periphery to its center. The snow mass, moving along the augers, is destroyed, its structure changes, so it will be easy to throw it to the side.
From the auger picking mechanism, snow flows onto the rotor blades. Here its translational movement is converted into rotational movement. It receives tangential acceleration and is thrown out through the pipe in a given direction: to the right or to the left in the direction of movement of the snow blower. Here the operator directs the deflector so that the removed snow does not interfere with the work.

