Do you want to build a summer shower in your summer cottage? Agree that cooling off on a hot day is simply necessary. What actually makes such a shower an integral part of the economy of a private house, cottage and garden plot. But you don’t know how to build such a structure and what components you will need?
We will tell you how to choose a tank for a summer shower and install it correctly - the article discusses the options for containers used for these purposes. A step-by-step process for making a shower is also proposed, including the nuances of preparing the tank for use as a shower storage tank with subsequent installation above the cabin structure.
To help the home craftsman, we have selected visual photographic materials with options for tanks for a shower cabin and an informative video with practical recommendations for making a homemade shower for taking water treatments.
Homemade shower tank
Owners of private houses and garden plots began to buy ready-made (factory) products relatively recently. Before tanks appeared on the market in the quantity and assortment that is available now, shower containers were traditionally made independently.
In the manufacture of a tank for a summer shower, metal barrels are most often used - containers for liquid products with a capacity of at least 100 liters:
Image gallery
Photo from
Step 1: Preparing the Barrel for Making a Tank
Step 2: Installing a lid with a filling connection
Step 3: Installing the tank on the shower floor
Step 4: Connecting the Shower Head
Stage #1 - nuances of material selection
As a rule, the basis of the design was a technical metal barrel containing 50-200 liters of liquid.
Thin-walled metal barrels are used in large quantities for transporting chemical products and fuels and lubricants. As the contents are emptied, such containers often remain unused.
But summer residents and private property owners quickly found a use for bulk containers, using them as a shower water storage tank. By the way, it is now possible to find barrels of the same capacity made of plastic.
Making a practical shower tank from a former fuel container is not difficult at all. It is much more difficult to wash the container from the remnants of the chemical contents that remain inside.
A variety of methods are used to clean the interior area of chemicals. Steam, anneal, wash with gasoline, kerosene, soda and rinse thoroughly with water.
The tank prepared in this way is installed and successfully used for a long time.
Shower tanks are usually made from such barrels with your own hands. The main task of the master when using metal barrels is to clean their internal area from chemicals. They are well suited for installation on temporary and permanent use cabins
The barrel has the shape of a cylinder, and this is its disadvantage in terms of design manipulations.
Flat tanks are more convenient for shower construction, as opposed to cylindrical tanks. They are easier to place on top of the shower stall and easier to secure. The task of installing a tank-cylinder is somewhat more complicated.
Stage #2 - preparing and equipping the shower tank
It is logical to describe the unique instructions for the manufacture and installation of tanks of different shapes for showers with one example. The manufacturing and installation technology is almost identical. The only exceptions may be certain minor points.
So:
- Take a prepared metal barrel - 100-200 liters.
- The installation position of the barrel is determined - vertical, horizontal.
- A hole is cut out in the upper area for filling with water.
- A hole is cut out at the bottom for the shut-off valve.
The container is ready for installation, but before it is in full condition it needs to be equipped with a ball valve, and also a watering can be added to the valve - a water divider. Shut-off valves can be used in different designs.
But it is advisable to use taps with linear adjustment of liquid flow. Smooth adjustment of water flow means economical consumption and more convenience for the user.
Shut-off valve with a connection for the shower head, installed on a plastic barrel and ready for use. The end part of the pipe is made taking into account the quick removal of the watering can. The tap is fixed to the barrel using large-diameter rigid washers. This approach ensures reliable insertion
The tap is mounted on the barrel of the summer shower, inserting it into the previously made hole in the bottom. It is necessary to equip the valve inlet pipe with rigid support washers and thick rubber gaskets.
On each side of the barrel wall, at the point where the tap is installed, place one washer and one gasket. Tighten the valve fastening nut inside the barrel tightly onto the thread.
After installing the control valve on the barrel of the summer shower, you can immediately add a watering can to it. It is wise to make the shower head a quick-removable element and not attach it rigidly to the valve.
The practice of operating summer shower cabins shows rapid contamination of the holes in the shower head. There is a need for frequent cleaning. If the structure is quick-removable, cleaning will not take much time.
Stage #3 - installation of the tank above the cabin
Having completed all the operations for manufacturing and equipping the storage tank with fittings, they begin to install it above the shower stall. The traditional place for installing a tank for an outdoor shower is the upper beams of the shower cabin frame.
But if the cabin structure has a good margin of safety, you can mount a metal “landing” for the tank at the top. However, it is more logical to mount wooden supports on a wooden cabin.
To install a metal barrel in a “vertical” position, construct a platform of boards or beams. This installation scheme is accompanied by fewer installation difficulties. However, the convenience of servicing a vertical tank is less comfortable for the shower owner
The cylindrical water storage tank can be installed horizontally across horizontal beams or along them.
The first design involves installation directly on the beams, followed by installation of fixing shoes under the walls of the barrel. These stop elements are made in the shape of triangles, one of the sides of which (along the hypotenuse) is tightly adjacent to the wall of the tank.
The second design differs in that the cylindrical tank is placed in the opening between the beams to a depth of no more than 1/3 of the height of the barrel in a horizontal position.
In this case, tension bars are inserted flush with the end parts of the cylindrical container, perpendicular to the beams. For this option, beams and tie bars must be calculated taking into account double the load.
Vertical installation of a cylindrical shower tank involves making a small platform at the top of the shower stall.
The platform can be made of boards, but it is better to use perpendicular inserts with bars between two beams. The bars (4-6 pieces) are inserted with a gap equal to their cross-section. Fasten them to the beams securely and conveniently using metal corners.
Image gallery
Photo from
Fastening the barrel with a metal strip
Vertical installation with guy wires
Placing the tank under a polycarbonate roof
Welded structure for shower tank
Construction of the frame
Grillage beams should be laid on the foundation piles, which will simultaneously play the role of the lower frame. Next, using corners and self-tapping screws, racks are attached to them, the upper ends of which are connected by beams of the upper frame.
If the frame is assembled from wood, all elements must be treated twice with a water-polymer composition, then with biocides. The last stage of preparation is treating the wood with hot bitumen.
Wood frame
It should be borne in mind that even with such precautions, increased humidity will soon lead to the appearance of fungus on the wood. To delay this moment, the wooden shower should be raised above the ground by 200 - 250 mm. The frame is sheathed with moisture-resistant plywood or plastic, then the walls are covered with foam plastic, on top of which colored polycarbonate is fixed
At the top of one of the walls in the locker room and shower there should be an opening covered with transparent material
The frame is sheathed with moisture-resistant plywood or plastic, then the walls are covered with foam plastic, on top of which colored polycarbonate is fixed. At the top of one of the walls in the locker room and shower there should be an opening covered with transparent material.
It will be better if such a window in the shower stall is opening - this will make it possible to quickly dry it after water procedures.
Features of installing a flat tank
A flat tank made of polyvinyl chloride, purchased in a store, is much easier to install than cylindrical containers.
There are design solutions where a flat container is simply placed on top of the summer shower cabin and left in this position without any fastenings.
As a rule, this option is relevant for assembling shower cabins for temporary use - for the summer season.
This is one of the many options for installing a flat shower tank. Often, such options are made without attaching flat tanks to the base of the cabin. Filled with water, the flat tanks rest securely on the surface of the shower enclosure.
When there is a need to mount flat tanks for summer shower structures, one of the options for reliable fastening seems to be the following:
- A flat tank is selected according to the dimensions (width, depth) of the cabin.
- Placed on top flush with the lines of the frame bars.
- At the corners of the frame, where the tank adjoins it, corners are attached.
- The corners (metal) are fastened overlapping the tank body.
It is also possible to install a flat tank and secure it above the shower stall in the “edge” position. This installation method is possible for a summer shower, the cabin of which has modest dimensions.
Installing a flat storage tank “on the edge” allows you to equip a small-sized shower stall with an impressively sized tank. The main thing is to correctly calculate all the loads so that the wind does not inadvertently drop the structure.
It is recommended to carry out such installation in a place protected from the wind, but with open access to sunlight. The storage tank is inserted in the edge-on position between the beams and lowered until it stops against the limiting elements.
Restrictors can be made from metal corners or strips. They are attached to the frame beams. To fix the top of the tank, thrust bars are installed.
Scheme for installing a flat shower tank in the “edge” position. The fastening is made using side stops and metal strips on which the container is placed. In this way, large-capacity tanks are installed on small-sized cabins
By the way, it is easy to stretch a transparent polyethylene film over the persistent beams, thus creating a kind of greenhouse. The sun's rays will pass freely through the polyethylene and will effectively heat the water in the tank.
At the same time, due to the space closed by the film, an atmosphere of heated air will form around the container. It will additionally heat the water in the tank for a summer shower.
Plastic or metal - which one is better to choose?
There are many offers for the sale of tanks on the market. Perhaps the two types that differ most are plastic and metal. It would seem that metal ones should be more reliable. But that's not true.
Factory-made iron tanks have thin walls - up to 2 mm. Moreover, even if it is galvanized, the thickness of the galvanization is scanty, and its quality leaves much to be desired. By the way, German cars of the premium segment also rust, but at the BMW and Mercedes factories the bodies are immersed in cataphoresis baths, and even then covered with several layers of expensive paintwork. And yet, after 6-7 years, cars often begin to rust.
Therefore, it is not surprising that after 3-4 years the metal container leaks at the joints.
Plastic tanks have a significant advantage - electrical insulating properties ! Tanks are often equipped with electrical elements for heating water, which can short-circuit to the body. It’s scary to imagine the electrical injuries a wet person could receive when touching the walls of an iron tank. The consequences can be catastrophic, even fatal! For this reason, it is recommended to choose plastic tanks.
About heating water in a summer shower
It is clear that, in most cases, owners of summer shower cabins expect to receive water heating from solar energy.
But, depending on the area, solar energy is not always available in sufficient quantities to heat to a comfortable temperature.
Therefore, autonomous heating systems using electricity often become part of shower cabin designs. How is this done in practice?
Let's figure it out:
- The storage tank is equipped with a heating element.
- The shower cabin is complemented by a heating element control cabinet.
- Necessary precautions are taken.
The heating elements, as a rule, are TENs designed to operate while immersed in water.
For example, it is quite acceptable to use heating elements from modern washing machines. Moreover, it is advisable to create a group of two electric heaters, where one is working, the second is a backup.
To heat water to a comfortable (37-40°C) temperature inside a flat shower tank, one heater with a power of 1-2 kW is sufficient.
Heating element suitable for installation in a summer shower tank. This heating element model is designed for direct connection to a 220 V power supply. For this, a wire of the required length, a standard plug and a power socket are used. Simplified diagram without protection from possible electric shock
The electrical power supply circuit of the heating element must be thought through thoroughly and carried out in accordance with all electrical installation rules.
That is, in addition to high-quality wiring, the circuit must contain such components as an RCD, a circuit breaker, a heating element limit temperature sensor and a water temperature measurement sensor.
It is recommended to supplement the electrical heating circuits with a presence sensor, which will automatically turn off the power supply the moment a person is under the watering can.
Almost all industrial models of tanks for summer showers are available with holes for installing electric heaters. In homemade containers, it is also easy to prepare the installation site for the heating element.
Installation of heaters is carried out similarly to installation of a shut-off valve. The heater is inserted from the inside into the hole until the limiting plate stops against the wall of the tank.
From the outside, a paronite gasket is placed on the terminal, followed by a metal washer, and then the fastening nut is screwed on.
Installing a heating element on a metal tank for a summer shower. When performing installation, it is necessary to ensure a reliable seal at the point of contact of the heater skirt to the container nozzle
The limit temperature sensor cylinder is mounted directly on the heater tube. For example, they press it with a metal clamp. It is advisable to install a water temperature sensor inside the tank at the liquid outlet to the shut-off valve.
Detailed instructions for building a heated summer shower are described in this article.
Product forms
Plastic tanks designed for summer showers are made in the shape of a square or flat. The square container has a small height , which ensures rapid heating of water.
This is very convenient during the operation of the product. If, to create a summer shower on your site, you decide to opt for a tank that has a flat shape, then in terms of its characteristics it will not be much inferior to round products. The main advantage of a flat tank over round tanks is that it can be used as a roof for an outdoor shower.
Conclusions and useful video on the topic
Overview of the configuration and testing of the plastic tank:
Tanks of summer shower cabins in their modern modification can no longer be considered as simple barrels for water. In fact, these are technically advanced devices that contain not only autonomous heating functions, but also water flow and filling controllers, disinfecting devices and other paraphernalia.
This means that the manufacture and installation of water storage tanks is often not inferior to other technical devices in terms of the complexity of the work.
Do you have experience making a country shower? Or still have questions on the topic? Please share your opinion, leave comments and add photos of your homemade products. The communication block is located below.
“Cake” of 8 layers
I leveled the surface of the slab at the base of the future shower tray by filling it with a self-leveling floor mixture, after which I secured sheets of insulation—extruded polystyrene foam—on it with tile adhesive. The thickness of all layers was selected in accordance with the design of the drain: its grate should ultimately be 1-2 mm below the surface of the pan.
Finally, I adjusted the drain of the shower tray to the level and laid a plaster mesh over the insulation, securing it with self-tapping screws. I installed the beacons and poured the cement screed (photo 2). After the cement had gained strength (after 3 days at a temperature of +20 °C), I once again coated all the corners and joints of the planes with fiber rubber for additional waterproofing, and after it had dried, I filled it with tile adhesive. At the exit from the shower stall, I installed a water barrier made of sand-lime bricks and plastered it with moisture-resistant cement plaster over the reinforcing mesh.
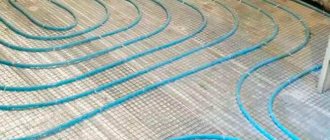
To make taking a shower truly comfortable, and to make splashes of water dry faster, I decided to make a heated tray. To do this, on top of its surface and throughout the entire area of the bathroom, I laid the electrical cable of the heated floor (photo 3) according to the diagram (its total power was about 1.5 kW) and filled it with a coarse self-leveling mixture (3). It is better to use a special leveler for heated floors - it has a higher thermal capacity and is less susceptible to thermal expansion.
Shower tank Sadko 150 l 2.0 kW with thermostat
This model has an ergonomic design and a fairly large volume. Allows several users to take a warm shower at once. The built-in electric heater will provide heating even in the absence of sun.
The advantages of this tank include:
- High-quality heat-resistant plastic painted black. Allows you to get the most from solar heating.
- The material is environmentally friendly, does not emit toxic substances, and does not contribute to the development of microorganisms inside.
- Built-in thermoregulation sensor. Allows you to precisely adjust the water temperature.
- Long service life. Can last up to 25 years without losing its appearance.
Due to the light weight of the empty tank (5.5 kg), there will be no problems with its installation. Even one person can handle this task without special tools.
- Cost: 150 BYN ($63.49)
- Model link: Sadko shower tank 150 l 2.0 kW with thermostat
Adviсe
Recently, most owners of summer cottages prefer to install a summer shower on their own, since such a process is not particularly difficult. But in order for the structure to be durable and comfortable, you need to know how to install it correctly.
The following recommendations can help beginners with this.
- Before building a shower, you need to choose a place to install the structure. It should fit harmoniously into the overall design and be placed where there are no drafts.
- The drainage hole should be made based on the volume of the tank; it should be 2.5 times larger than it.
- Septic materials and drainage should not be installed directly under the cabin; this must be done next to it, otherwise it will not be possible to avoid the penetration of an unpleasant odor.
- Covering the drain is best done with waterproofing materials.
- During the construction of a structure, it is not recommended to use clay, as it quickly gets wet and washed away, as a result of which the drainage system may become clogged.
- Water flow can be improved by installing the shower stall in an elevated place.
- The design should be comfortable for swimming and have free space, so its height should not be less than 3 m. In addition, 1 sq. m. m needs to be allocated for a locker room. The optimal width for a shower stall is 190 cm.
- The base and frame of the structure must be made strong and reliable; they must withstand heavy loads, since a water tank will be installed on top.
- The external cladding of a summer shower can be made with various building materials, but it is best to give preference to slate sheets, fiberboard, polycarbonate, moisture-resistant plywood or lining. At the same time, the finishing material must not only be reliable in operation, but also fit harmoniously into the landscape design of the site. Therefore, if necessary, it can be painted or decorated with original drawings and patterns.
- You should ensure that the doors of the structure close tightly and do not let in cold air currents. Additionally, you can install thermal insulation on the door and attach sealing elements along its contour. This will help retain heat inside the structure and protect the doors from the negative effects of moisture.
- A summer shower can also be used in winter, but in this case its structure should be well insulated. To do this, polystyrene foam, polystyrene foam or mineral wool are applied to the walls and ceiling of the booth. Thermal insulation is fixed with a stapler and sheathed with decorative material.
To learn how to make a summer shower with your own hands, see the following video.
Preparation for construction
Next, we will consider the process of constructing an all-weather shower, as the most in demand throughout most of our country.
Choice of frame material
Before starting construction, you need to select the frame material. As was said, plastic pipes are no longer needed due to insufficient strength, so you have two options to choose from: wood or rolled metal.
Wood
Positive sides:
- low cost;
- ease of processing.
The disadvantage is a short service life due to susceptibility to rotting and drying out.
Beams of a certain cross-section are suitable for the frame
Specifically you will need the following lumber:
- for the bottom trim: insulated shower - timber with a section of 150x150 mm, lightweight - from 60x60 mm (optimal - 100x100 mm);
- for racks, oblique connections and top trim: board with a section of 100x40 mm.
Materials used
The production process of such products is carried out using special polyethylene. It is not exposed to the sun's rays, is highly durable and environmentally friendly. This material perfectly retains water and protects it from flowering, even if it is in the container for a long time. Compared to metal products, plastic ones do not corrode . If your choice falls on ordinary plastic containers, then you can “tune” it.
In addition to a polyethylene reservoir, flat containers for country showers can be made from elastic polymer fabric. Its advantage is that their tanks are actively used for drip irrigation or storing liquid as a reserve.
