Introduction
Wood has found application in a wide variety of industries. This raw material has always been popular due to its versatility, ease of extraction and processing. Furniture, interior items and even entire houses are made from wood.
Any craftsman encounters this material, but, as practice shows, not everyone is able to accurately cut a board. Tools often leave chips or nicks on the cut, which does not add beauty to your product. So what’s better, cut it yourself or order it?
Many companies offer to cut your boards when purchasing, and the price for this service is not too high. In production, boards are cut by a qualified craftsman using precision equipment, which allows you to obtain high-quality workpieces of the desired size and shape.
You, of course, can acquire expensive equipment yourself, but is there any point in this if you need to cut several boards? It’s up to you to choose, but if you still decide to cut boards at home, then I’ll tell you how and why it’s more convenient to do it.
Milling with a grinder
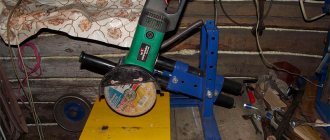
Another dangerous tool, but permitted for use if precautions are taken, is a wood cutter for angle grinders. Using such a cutter you can make grooves, roughly level an edge, cut out bowls for a log house, and even saw workpieces
The design eliminates jamming and throwing of the tool on non-uniform wood. Before use, be sure to read the instructions, especially the sections about maximum speed and direction of rotation relative to the position of the angle grinder
Using such a cutter, you can make grooves, roughly level an edge, cut out bowls for a log house, and even saw workpieces. The design eliminates jamming and throwing of the tool on non-uniform wood. Before use, be sure to read the instructions, especially the sections about maximum speed and direction of rotation relative to the position of the angle grinder.
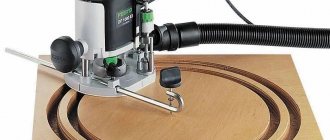
The range of cutters for an angle grinder is not inferior to the choice of attachments for a hand router. Of course, you won’t achieve the same exact processing, but you can choose a suitable attachment to give the workpiece any shape.
What is the best way to make a cut?
Circular saw
This is the most convenient tool for sawing boards. Compared to some other power tools, it has better performance. But it is worth remembering that circular saws differ in characteristics and scope of application.
Before buying a saw, decide for what purpose you will use it. The main use of circular saws is cutting or cutting boards.
When choosing a saw, you need to consider the depth of the saw. There are circular saws on sale with cutting depths from 30 to 130 mm. You need to find out what thickness of boards you will be sawing and, based on this, give preference to one saw or another.
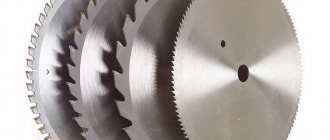
It is also worth taking a responsible approach to choosing a blade for your circular saw. If you need to make a neat cut, you should choose a saw blade with a higher tooth frequency. If the teeth on the disk are sparsely spaced, the work will be faster, but much rougher. It is important that when working with a circular saw, the cuts are smooth and practically without chips. This is discussed in more detail in my book. More details about it in the “BOOKS” section.
To start working with a circular saw, set the depth of cut equal to the thickness of your board. Thanks to this, you can make the most beautiful cut on almost any surface without leaving marks.
But it is worth remembering that if you make a cut at 90 degrees, the cutting depth will be the same, but for a 45-degree cut the cutting depth will be much greater. Then check that nothing interferes with the protective casing, otherwise it simply will not open.
Fix the board so that it does not slide on the table during work; this requires a stop along and at the end of the workpiece. By the way, some saws are equipped with a thumbscrew that allows you to set the cutting angle. Typically, circular saws have a range from 90 to just under 45 degrees, allowing you to make neat, angled cuts.
Don't forget about safety precautions when working with a circular saw. Always wear safety glasses or, better yet, a full-face mask. Remember that almost all tools are designed for right-handed use, which means that all sawdust and other debris will fly out from under the saw on the left side, so left-handers should be more careful about eye and respiratory safety.
Angle grinder or grinder
Some craftsmen advise using an angle grinder if you have a large amount of work and low quality requirements.
Do not try this method under any circumstances. The grinder is designed to give a beautiful look to a welding seam or to cut bricks, and you simply can’t do it without a saw. Cutting boards with a grinder is dangerous.
When cutting boards with this tool, craftsmen advise placing a notched disk for a circular saw on it. Imagine that while working, the grinder caught a piece of wood in one of the notches, you immediately release the power button (those who worked with it know that after turning off the disk will make a few more revolutions) and it is not known where you will find your tool after that, on the floor a couple of meters away from you or in your body.
Or, for example, the disk got hot and burst, which is also quite possible; pieces of the hot cutting wheel scatter over the entire area, and some of them may land on you. Other craftsmen use a disk with a victorium solder, which can also easily end up in your foot.
Therefore, it is better not to take risks, but to use a tool specially adapted for this work.
Hacksaw
In order to make an even cut with a hacksaw, first you need to draw a cutting line with a pencil on the board, then position the workpiece so that it is convenient for you to work with it, and secure it in this position. The next step is to set the hacksaw at a position of approximately 60 degrees to the product, guide the saw with your thumb so that it runs exactly along the cutting line.
Start cutting as soon as your cut is so deep that the saw can easily “walk” in it without losing its mark, you can turn it to a position that is convenient for you, usually 90 degrees, and continue cutting until you achieve the desired result. If the wood is damp and soft, the hacksaw teeth will get stuck in it, making the job more tedious and time-consuming.
To make your work easier, lubricate the tool with soap, which will make your task much easier. For a novice craftsman, the first cuts are not very even, so it is better to use a block that will serve as a guide.
If you need to make a cut at an angle, use a miter box. It has pre-made grooves for a hacksaw. All you have to do is attach it to the workbench, place the part in a special groove and cut along the angle you need. The cut will be smooth, with virtually no chips.
In order to cut the boards beautifully, it is better to use the help of a qualified craftsman; if you think that you are able to cope with this work yourself, then under no circumstances make cuts with a grinder; it is better to use a hacksaw. For clean cuts along the board, the best tool is a circular or circular saw.
An important point in cutting boards is accuracy and precision; this is painstaking and labor-intensive work. The main thing is to never forget that any hand tool, and even more so a power tool, can cause harm to you, never neglect the safety rules, it’s better to be safe, because health is the most important thing.
Type of cutting discs
Today there are many different cutting discs that are designed for a specific material. Cutting tiles with a grinder should be done with a stone or steel disk (a dry cutter) with diamond chips on the working edges. Dry cutters are divided into several types:
- Stone circles are much cheaper than metal discs, but they deteriorate faster and leave a wide cut on the tile. While working with them, it is necessary to constantly monitor the integrity of the working edge, otherwise the disc may puncture the material, and then completely fly apart and cause serious injury to the user. Therefore, when cutting ceramic tiles with such a nozzle.
- Metal dry cutters allow you to work without water cooling, but no longer than two minutes, after which it is necessary to cool the grinder at idle speed. It is more rational to purchase a disc with continuous diamond coating on the working edge.
If, when cutting ceramics, a luminous trail of sparks appears, then it is necessary to correct the protective metal casing; sometimes it warps and touches the disk. If the problem persists, it means that the steel is licking and needs to be cleaned on concrete or plaster. Otherwise, the dry cutter will become unusable due to overheating.
Waterjet cutting
A relatively new, but already very common method of cutting tiles and other sheet materials. The principle is based on the effect of a powerful jet of water of small thickness on the material, as a result of which there is no temperature effect on the workpiece, so it will not deteriorate and will not lose its qualities.
READ How to Cut Aluminum Angle
Assessment of the scope of work, crown pruning
The main problem when felling trees is that it is impossible to accurately predict how the crown mass is distributed. Accordingly, you cannot accurately predict the trajectory of the fall, even if you trim the trunk correctly. To make the work easier, it is recommended to carry out work in spring or late autumn, when the crown is thinnest. The weather should be calm and dry, and the tree should not be slippery after recent rain.
First, set up a stepladder and trim off any lower branches that are within reach. The stepladder must be installed in such a way that there is a tree trunk between it and the branch being cut. The most advantageous position, including when working without a stepladder, is when you hold the chainsaw with both hands, as if hugging the barrel.
The crown must be trimmed strictly in sequence from bottom to top, so that the cut branches fall freely and do not get tangled in the lower ones that have not yet been cut down. The rope, with which the assistant helps control the fall, should be tied 1–1.5 m from the trunk. The branches need to be trimmed so that branches 30–40 cm long remain, on which you can easily put safety lines or rest your feet.
When the stepladder is no longer high enough, place a leg strap over the most comfortable branch or wrap it around the trunk at the desired height, and then rest your feet on the loops. You need to position yourself so that the sawing site is at chest level or slightly lower. While hugging the tree with one hand, wrap the second lanyard (or better yet, a chain) twice to secure your belt, connect the loops with a carabiner and tighten the coupling on it. The second advantageous position is to turn your back to the trunk and stand with your feet on the branch to be cut, while you need to cut it, naturally, half a meter in front of you.
Before you start cutting, adjust the length and height of the slings for comfort and make sure you have enough room to maneuver. After this, you can lift the chainsaw from the ground by the rope tied to the handle, and the attachment location should be chosen as far as possible from the tool controls.
Why are they falling?
The first, and also the main, reason for the fall of trees, including tall ones, is a poor, weakened condition associated with diseases and any other damage to the trunk or root system. A healthy plant can withstand very serious loads, such as heavy winds, for example.
The second reason is the large windage. Tall trees grow in conditions of fierce competition with each other for a place in the Sun. They quickly stretch upward, and therefore their trunks are usually straight, without branches in the lower and middle parts. The crown is formed closer to the top and becomes the “sail” that “catches” the wind, causing the trunk to fall.
April 2014 Photo: Kaleria Lapshina
A clear example demonstrating greater windage is the Scots pine, widespread from China to the British Isles. In the European part of Russia it can be found everywhere. How can one not recall the paintings of I. I. Shishkin, especially his famous “Ship Grove”, which depicts tall, slender mast pines, with cone-shaped crowns crowning the very tops!
Another reason for the fall may be the root system. Common spruce, typical of the northern regions of Europe, has a shallow root system that does not securely hold the plant in the ground. Along with the trunk height of several tens of meters, this leads to poor wind resistance.
April 2014 Photo: Kaleria Lapshina
Which comes first: felling or trimming?
Some trees do not need pruning, while others cannot be felled otherwise. Especially if gas pipelines or power line wires are located near the crown. As we have already said, the main purpose of pruning is to balance the tree, so it is not necessary to trim the branches on the side where you plan to collapse.
The height of the tree is no less important. If you cannot clear an area of the required length under the tree, the trunk needs to be shortened. Naturally, before this you will have to cut off all the lower tiers of branches, sometimes you even have to cut off the branches from the side of the blockage. What to do - sometimes the crown is intertwined in a very bizarre way.
When working in the garden and green spaces, neighboring trees often interfere. If this is not dead wood, it is not advisable to touch them. It is much better to cut the branches in sections, starting with the one furthest from the trunk that can be safely reached. Even if small fragments of branches get stuck in your own or neighboring crown, an assistant can easily pull them down and to the side.
We can definitely say that you should start felling only if:
- After treatment, the appearance of a tree clearly makes it clear that it will fall exactly the way you want it to.
- The height of the tree is 30–50% less than the length of the cleared area, similar to the width of the crown.
- There are other trees or stationary objects nearby to which guy ropes can be attached to guide the trunk when it falls.
What you need to remember when working with an angle grinder on wood
The most important thing, which many people sin with, is that you should never remove the protective casing, no matter how much you would like to see the place of the cut. The destruction of the disk can occur at any moment, and fragments will fly not only to the operator, but also to others, and with such incredible speed that no one will have time to react.
What else is important:
- you need to check the strength of the protective cover;
- you should check the integrity of the disks, excluding those that have chips or cracks;
- the grinder must be held so that the protective casing is on the operator’s side;
- When starting work, you need to check the tool at idle speed at different speeds. The tool should not have vibration;
- Before work, you should inspect the tree for knots;
- hold the grinder firmly with both hands;
- take a break from time to time to inspect the disc;
- if the angle grinder jams, turn it off immediately;
- choose a stable body position when working;
- make sure that the cord does not get under the disk;
- Move only with the tool turned off.
Securely fix the attachments and adjust the speed
Remember, you need to work with such a tool only in a concentrated, adequate state. Use protective gloves, mask and goggles
How to trim a trunk correctly
Now you can move on to the easiest part of the process and fell the cleaned trunk. It's really simple, the main thing is to make the cut correctly.
From the side where you plan to cut the tree, use a chainsaw to make an oblique cut from top to bottom, one-third of the trunk diameter at an angle of 60°, as shown in the figure. Next, from the bottom we make a cut straight or at an angle of 30° so that we end up with a wedge. The tree will fall in a direction perpendicular to the fold line created after knocking out the wedge, so it is advisable to make the joint of both cuts as even as possible.
On the reverse side, we retreat upward from the plane of the lower cut by 2/3 of the trunk diameter or a little more. We cut diagonally and downward, directing the cut to the inner corner of the wedge-shaped notch. As you approach the center, you will hear a characteristic crack and the tree will begin to slowly tilt. The saw must be immediately removed from the expanding cut and calmly moved five meters away from the tree.
There is no need to tie any ropes and pull them, the trunk will fall by itself. On the contrary, there should be no people at all in the direction of the fall. However, do not forget that it is still worth tying the guy ropes.
Preparing to cut down a tree with a chainsaw
Before cutting trees with a chainsaw, you need to make sure that the unit at your disposal is designed to perform such actions. For felling large trees, professional and semi-professional chainsaws are used, with a power of 2 kW and above.
When getting to work, you need to take into account the size of the tire on the tool. If the diameter of the wood does not exceed 30 cm, then for effective sawing, saws are used whose bar length does not exceed 35 cm. If the diameter of the trunk is more than 40 cm, then you will need to use a chainsaw with a 65 cm bar installed. The thicker the trunk, the more difficult it will be to cut it .
To understand the task, before starting the tool you will need to perform the following manipulations:
- Check the quality of sharpening of the chain teeth. If they become dull, then be sure to sharpen them before cutting down the tree. It is recommended to do this using a file
- Check chain tension. If the chain is loose, it needs to be tightened
- Make sure there is enough fuel mixture in the tank. If the tool has less than half a tank, it is better to refill the tool
- Calculate the trajectory of the tree's fall and clear the area. If the tree being cut leans and catches on neighboring twigs and branches, it will be very difficult to fell it
- Clear the area near the tree to have easy access to it
- Take all the necessary tools for felling trees, which include an axe, mallet, hammer
If there is a strong wind blowing on the day you plan to fell a tree, it is recommended to postpone the work until weather conditions improve. Carrying out such work when weather conditions worsen is dangerous, especially if the sawyer works alone without a partner.
What attachments can be used for working with wood?
As already mentioned, not every nozzle is suitable for this task. You should not take risks using dikes that are not intended for working with wood. Possible attachment options are shown below.
Chain disc or cutter
This version of the attachment has a device that allows you to rotate it even when biting the chain mechanism, eliminating the possibility of a sudden jerk.
With the help of such a cutter you can make recesses in a log, remove bark, cut out complex relief on the surface
In principle, you can cut with a chain disk if it has a diameter of 23 cm, but such an attachment will cost a lot.
Saw blade with few teeth
Please note that on the surface of such a disk the manufacturer writes information about the maximum number of permissible revolutions.
Large spacing between teeth makes working with wood safer
In addition to wood, such discs cope well with aerated concrete blocks.
Tungsten carbide discs
Such attachments appeared relatively recently and have already become very popular. The reason is that they can easily handle small metal particles at high speeds.
This is perhaps the only attachment option that will accurately cope with sawing, without any unpleasant nuances
For your information! Rotarex blades, which can be used for sawing wood, are in great demand.
In addition to, in fact, discs for processing wood, there are other attachments for angle grinders.
Wood sanding attachments
Since the machine is called a grinder, then it should not have any problems with grinding. For this purpose, when working with wood, a holder attachment is used, on which an abrasive wheel with grains from large to fine is molded.
How to cut down a tree with a chainsaw without getting injured
It doesn’t matter what tool is used to cut down the tree - a gas or electric saw. Initially, you will need to put on protective clothing, which includes a helmet, goggles, headphones, protective overalls and boots. Even if the cutting element touches the body, the clothing will be damaged, protecting the person’s skin.
Before cutting wood, you will need the help of a partner. After all, the process in question is very dangerous, so the slightest wrong action can lead to injury. If the sawyer gets hurt, his partner will be able to help him. If you work alone, this will not only lead to increased sawing time, but also to rapid fatigue. The basic rules for felling trees include such a criterion as determining the center of gravity. Experienced sawers will be able to determine the trajectory of the fall by eye, looking only once at the wood. It will be difficult for beginners to determine the trajectory of the fall, since even professionals sometimes make mistakes and miscalculate.
In order for a beginner to determine the direction of fall, you need to perform the following steps:
- Carefully inspect the trunk - the direction is influenced by the shape of the crown
- Determine whether there is a slope. If there is a slope, then it is in this direction that you need to fell the wood, without trying to change the trajectory yourself
- The direction of the wind, which determines the direction of fall. Where the wind blows, you should strive to topple the tree
How to cut down trees with a chainsaw (detailed description)
Following safety precautions when felling a tree is an important procedure. If you have never worked with a tool, you should first practice on branches and twigs.
The technology for felling large and small trunks has significant differences. The technology for felling large trees with a diameter exceeding 50 cm is as follows:
- On the falling side of the wood, you need to make a cut with a slope of 60 degrees. This slope is needed to direct its fall
- Once the bevel cut is made to ¾ or ½ of the trunk, a horizontal cut is made. It turns out a corner or wedge that should be pulled out. The resulting side cut is the direction in which the wood falls
- On the opposite side, horizontal sawing is done with a slight slope. This undercut is made slightly higher (3-5 cm) than the bottom cut from the side of the blade notch
- The undercut is made approximately to the middle of the trunk. The tree must remain horizontal
- A mallet or wedge is inserted into the resulting undercut, which will prevent tilting in the opposite direction.
- A light cut is carefully made from the side (in the area where the cut triangle is located), and you need to push the barrel with your hand to put it directly into the intended area
These cuts should be made on the trunk at waist level. Specialists immediately begin making cuts at the root, but this is very difficult and not safe. It is better to cut down the remaining part of the stump later, rather than the tool getting stuck inside the wood.
Is it possible to saw wood with a grinder using a metal attachment?
Most of these discs have fine teeth, necessarily supplemented with pobedite or diamond chips. This allows you to work with both metal and natural stone. It is dangerous to use such attachments for wood, but there are models of disks whose design is close to the optimal cutters for soft materials. So, you can cut wood with a metal disc using a grinder in cases where two conditions are met:
- The circle has a rare and medium tooth (a large one increases the risk of a wedge).
- Segments or other inserts on the surface of the nozzle are made of tungsten or carbide.
This design will minimize undesirable effects during work, but according to safety regulations, this is not enough to use an angle grinder in such operations.
How to cut down a small diameter tree with a chainsaw
Before approaching the trunk, you need to use a hatchet to cut down all the small plants and branches that impede access. After this you can proceed:
- The slope is determined. If there is no slope, then you need to cut at a slight angle from top to bottom, but not vice versa, as the tire may jam
- Once the saw has passed most of the trunk, the tree will begin to slowly tilt
- At this moment you need to turn off the saw and try to cut down the wood
Once the tree is felled, you can begin sawing the branches. This must be done carefully, since you can get injured not only when felling a tree, but also when cutting branches.
When is the best time to do it?
Most of all, gardeners are interested in when is the best time to prune branches. In fact, it is very important to choose the right time, because the condition of the tree depends not only on the skill of the gardener.
It is believed that the best time for the procedure is when the frosts have already ended and the growing season has not yet begun, that is, the sap in the branches does not move very quickly. As a rule, pruning is carried out at the end of February or in the spring, at the beginning of March. In cold regions, the timing may shift due to prolonged frosts, and in some cases pruning can be done in the summer, in June, for example, in the case of sanitary work, when it is necessary to urgently save the tree. This has to be done when the plant is infected with powdery mildew.
Autumn pruning is also acceptable, when the entire harvest has already been harvested and the circulation of tree sap slows down. The best time for autumn pruning is late September and early October. Many gardeners note that it is after autumn pruning that trees begin to grow well.
But in May it is extremely dangerous to carry out the procedure, since in this month the tree is actively growing, the leaves are blooming, and if the weather permits, then abundant flowering begins. But when it comes to pruning, you need to focus not only on time, but also on tree species. As a rule, pome trees, such as apple or pear, are always pruned first, and only then do stone fruits. Weather also plays an important role in pruning. It is better to start processing trees when the sun is shining and the air temperature does not drop below minus five.
How to cut branches
We begin sawing the branches, and this should be done only when the trunk lies on the ground in a horizontal position. The lower branches, which rest on the ground due to the weight of the fallen wood, need to be cut down at the very end. The process of properly sawing branches with a chainsaw is as follows:
- You need to start work from the bottom of the trunk, moving to the top
- When all the branches have been removed, you need to cut the trunk in half from the top
- After this, the saw must be turned off, leaving the
- Drive a wedge into the hole to prevent the tool from biting.
- Perform further finishing
To properly cut a trunk, you need to start from the beginning of the top of the tree. To prevent the tool tire from jamming, always work according to the instructions. Often, even experienced sawers encounter the fact that the saw gets jammed between two trunks. At the same time, you should not try to free it by fidgeting and pulling towards yourself - this can break the instrument. Stop the saw, find a support to lift one part slightly, and release the tool guide. It is difficult to do this without a partner, so never work in the forest on your own.
Source: moiinstrumentu.ru
Sawing and Sawing Wood
Wood is a valuable natural material created by nature itself. People have been using this wonderful raw material for many centuries to build houses, create furniture, decorative interior items, and also use it for industrial purposes. For these reasons, proper processing of a felled trunk is an extremely important task. Sawing and planing wood are the most important operations with wood. In this article we will talk about what wood sawing is and what types of sawing exist.
Log sawing is the process of converting valuable natural raw materials into lumber. When sawing wood using different methods, you can obtain lumber of different sizes. To obtain high-quality products, you need to choose high-quality, even logs that are not damaged by pests.
Types of wood cutting
The quality of the final product depends on a large number of factors - the type of wood and the quality of the raw materials, the professionalism of the workers, and proper drying. However, there is another important aspect - this is the method of cutting timber.
There are the following cutting methods:
- tangential
- radial
- rustic
- longitudinal
- transverse.
Rustic is a cut that is performed at an acute angle to the direction of the grain. This method is used in the manufacture of lumber for rustic flooring, which can be called the most heterogeneous and original in pattern and shade.
During tangential cutting, the cutting plane lies tangentially to the annual layers of the material at a certain distance from the core. Since wood fibers are most often located in different directions, a natural pattern in the form of fancy “arches”, “curls”, “rings” is obtained on the surface. The structure of the board with this cutting option is heterogeneous; wood pores may be present. At the end of the tangential cut, the boards are characterized by an increased coefficient of shrinkage and swelling. Also, this log sawing scheme makes it possible to increase the useful yield coefficient, which causes a reduction in the cost of the final product.
Sawing wood blanks using the radial method is carried out perpendicular to the annual rings. Thus, a homogeneous board is obtained with the smallest gaps between annual layers. This creates an attractive pattern and also increases the strength of the lumber. Radial materials are characterized by high resistance to deformation and wear resistance. Also, such boards have lower rates of shrinkage and swelling compared to tangentially cut lumber. Therefore, finished products, for example, parquet boards, floorboards, block houses, linings, practically do not crack on the front part, but tangentially sawn materials are susceptible to such phenomena. Glued laminated timber is created only from radial and semi-radial cut boards, because the mechanical and geometric parameters are directly dependent on the resistance of the fibers. This resistance increases during gluing of layers with multidirectional annual rings at an inclination angle of no more than 45°.
Only 10-15% of radial boards can be obtained from a single log. Therefore they have a high cost. The best performance is demonstrated by material having an angle between the annual layers and the cutting plane from 80 to 90 degrees.
Laminate construction
To choose the right tool for cutting laminated panels, you first need to understand what they are made of. Laminate is a finishing material with a layered structure, which consists of chipboard or fiberboard and special paper impregnated with melamine resins. During its manufacturing process, all layers are glued together by pressing under high (high-pressure laminate - HDL) or low (low-pressure laminate DLP) pressure.
Thanks to this production technology, the material has the following advantages:
- strength;
- moisture resistance;
- environmental friendliness;
- resistance to aggressive substances;
- long service life.
Structurally, laminated panels consist of the following layers:
- Bottom layer. Made from plastic or tarred paper. Protects the material from moisture seeping from the subfloor. Some brands of laminate are additionally equipped with a soundproofing layer. It is recommended to install such panels in apartments located on upper floors to muffle noise from neighbors below.
- Base. Made from fiberboard or chipboard. The strength and moisture resistance of the material depends on the quality and thickness of this layer. The joint part of the laminate, called the lock, is cut into the base.
- Decorative layer. Thanks to it, a unique pattern of panels is created with an imitation of natural stone, tile, wood, etc.
- Protective layer. It contains acrylic and melamine resins that protect the material from abrasion, shock and other mechanical influences.
READ Wood hole saw set how to use
Sawing wood across the grain
The technology of sawing wood across the grain is the most common method of processing timber in carpentry. At the same time, such sawing can be called the simplest. Longitudinal sawing of wood requires much more effort and certain skills.
Tools for cross-cutting timber are selected depending on the required accuracy, the amount of work and the conditions available in each individual workshop. You can use:
- electric circular saw. She makes neat and fast cuts. For domestic use, a model with a 1000 W motor and a disk cross-section of 180 mm is perfect. Most circular saws come with a combination blade that can be used for a wide variety of jobs. The teeth of this blade are something between the teeth of a transverse and longitudinal saw. For long-term work, it is better to take a blade that is coated with carbide. Its cost is higher, but it takes 10 times longer to dull
- miter box and tenon saw. They are used for finishing. These tools can be used to make the most precise cuts.
- circular saw
- cross saw. When purchasing, please note that the teeth of such a tool should be alternately positioned to the left and to the right of the blade itself. They must be well sharpened and beveled. The most popular is a saw with 10 teeth per 25 mm blade. With 8 teeth, the saw will cut faster, but will create rough cuts.
Source: wood-prom.ru
