How to fill the seams between gypsum fiber board sheets to make them invisible
Drywall is a universal building material that allows you to quickly and efficiently level walls or ceilings. Due to its characteristics, it has gained wide popularity among consumers. With its help, you can level not only the walls, but also make arches and other interesting and non-standard ceilings.
The seams that are formed between the gypsum fiber board sheets must be finished at the finishing stage of the work. This will level the surface and make it neater for further finishing.
Tape with metal inserts.
Reinforcing tape with metal inserts
Reinforcing tape with metal inserts for Knauf plasterboard is not used for repairing cracks and for reinforcing joints; it is intended for gypsum board corners. Durable, able to withstand not only changes in drywall during temperature changes, but also mechanical impacts on external corners. The metal strip is made of a material that is resistant to corrosion.
Increasingly, for high-quality wall insulation, fire resistance and moisture resistance in domestic and industrial premises, sheathing with gypsum fiber sheets is used. It is an absolutely environmentally friendly material. When used indoors, a favorable microclimate is created, which has a positive effect on the general condition of a person. But the finishing coating will require additional processing of the sheets. You need to know exactly how to putty gvl.
Joint seams: what are they and how to seal them?
Even if the most careful craftsman in the world installs sheets of drywall, he will still not be able to prevent the appearance of seams between two adjacent sheets. The size of the joint itself will depend on the characteristics of the material, which has different types of edges. During installation work, the sheets create a visible depression on the surface itself; they can only be removed by finishing.
Uneven seams can appear when the erected frame is poorly fixed and is not rigid enough. The reason for the appearance is due to the fact that under the GVL paddle the metal structure is deformed - as a result, the edges of the sheets stick out and are uneven. There is another reason that affects the appearance of deep and uneven edges: under the influence of a sharp temperature jump, GKS sheets lose their linear dimensions. Small movements due to this reason can lead to the formation of small cracks.
Important! Unsealed seams between sheets of drywall will not allow you to apply the finishing coat to the wall without any difficulties.
Plaster is ideal for sealing such seams. It can be purchased at any hardware store. The pricing policy and composition of the product will surprise you and allow you to purchase the best option. But many craftsmen who work directly with plaster recommend not skimping on quality - the outcome of the final result will depend on this.
Before starting puttying work, various contaminants should be removed from the surface of the gypsum fiber board sheets. This can be done using a dry cloth or a construction vacuum cleaner. Then make sure that all nail heads and self-tapping screws are properly hammered in. If some caps protrude, they must be hammered in with a hammer. Be sure to cover the plasterboard wall with a primer, and only then begin to apply plaster, which is applied not only to the joints, but also to places where there are nail heads or screws.
Source
To install GVL on walls, you need to carry out some preparatory work:
- all old coverings are removed to the ground. The minimum possible interaction of the element with other building materials is required;
- if the base is concrete, then you need to carefully remove all elements that have already begun to peel off. So that the surface for working with gypsum plasterboard is free of noticeable flaws;
- if it turns out that there are several concrete slabs on one surface, additional work with the seams will be required. They need to be completely eliminated. In any hardware store you can easily find the latest generation of plastic compounds. They can fill in the gaps very well. How to putty GVL is discussed below.
In addition to interior wall treatment indoors, gypsum fiber sheets are also excellent for outdoor use. There are many features when facing walls with gypsum fiber board. They can simply be glued to the wall, or they can be mounted on profiles.
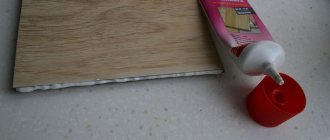
If a frameless cladding option is chosen, the joints are sealed with a special material. Putty with the required markings is available in all building materials stores. With this finish, no reinforcing tape is required.
But to skip this stage of work, you can take care of it right away. A wide range of different types is available in building materials stores. In addition to the main characteristics of resistance to moisture, low flammability and high thermal insulation, they are available with a polished surface and a regular one. And the edges can be chamfered or without them. If the edges are chamfered, then the joints are much stronger and less noticeable. These seams also do not require reinforcing tape.
How to seal the seams between sheets of drywall with your own hands (video)
Installation of plasterboard sheets on the frame is not the final stage in the construction of partitions in the premises of the apartment. It is also important how well the seams between the sheets of drywall are sealed before finishing. The gypsum board joint is the most sensitive and susceptible to destruction place. Cracks most often appear between the drywall, worsening the appearance of the walls. Surfaces for painting should be prepared especially thoroughly, although cracks become noticeable under the wallpaper. How to seal seams on drywall will be discussed below.
How to putty GVL for painting and wallpaper
Decorative painting and wallpapering are the most popular options for finishing surfaces lined with gypsum fiber board. Maximum smoothness can only be achieved by filling everything, the joints between the slabs, and the exposed screws. All work will be done in three stages:
- padding;
- preliminary puttying of the place where the sheets are glued;
- final puttying of the entire surface, finishing stage.
Do not forget that special dilutable compounds will be required for the installation of gypsum fiber board elements.
Conditions for high-quality seam sealing
It is very important to properly prepare the frame before installing drywall. To do this, it is necessary to follow the technology of its assembly, which includes the use of the required number of wooden blocks or metal profiles, compliance with their pitch, correct fastening, placement of the profile exactly under the joints of the sheets, etc.
Drywall is attached to the frame with self-tapping screws. Sheets are used with chamfered edges. If the drywall is installed with a cut edge at the joint or does not have a factory chamfer, it is necessary to create one using an edge plane. Tilt angle – 45°. It is not always possible to remove the chamfer in a timely manner, so it can be done locally after installation using a painting knife. Putty will subsequently be placed in the resulting recess.
When there are no chamfers at the ends of the drywall sheets, the sealed joint forms a convexity. In the future, the entire surface of the sheets will have to be leveled, which will lead to significant costs of labor and material.
When the joints are processed, dust is removed from them and the quality of the screws is checked. They are wrapped to the depth of immersion of the head by 1 mm in a sheet of plasterboard (paper base).
It is advisable for beginners to visually familiarize themselves with the technology for preparing drywall sheets (video, photo).
Wall decoration
To finish and level the walls, GVL is glued to their surface using putty or glue. If the unevenness on the walls exceeds 20 mm, then 100 mm wide strips of gypsum are first glued to the wall, to which the sheets are then glued using putty:
Here, as in the case of a partition, the sheets are pre-marked and cut, which are then glued to the walls, creating the most even surface possible. If you don't mind the higher price, use waterproof products.
Important! Don't forget to pre-cut holes for sockets and switches. This is easy to do using an electric drill with a circular saw.
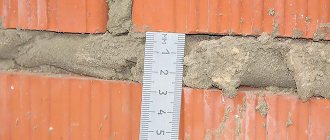
Between the sheets we maintain a standard gap of 5 mm (for gypsum plasterboard) or 1 mm (for gypsum plasterboard), which will then be filled with putty.
If the walls are too crooked, or their internal insulation is required, the frame finishing method is used. To do this, the wall is first leveled with a structure made of PS and PN, which are fixed to the surface with dowels or brackets.
The pitch of the racks and the principle of assembling the frame are the same as when constructing a partition, only here each rack and horizontal part are attached to the wall in three places.
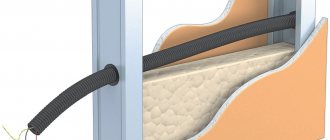
After assembling the frame, it is covered with plasterboard, similar to the frame sheathing from the previous chapter. The space between the wall and the sheathing can be filled with insulation.
Among the many interior finishing materials, plasterboard is recognized as one of the most common. This material is a gypsum board of a certain thickness and size, covered on both sides with a layer of cardboard. Such sheets are used to create volumetric structures, arches, leveling walls and creating suspended plasterboard ceilings of varying complexity.
Choice of putty
When sealing seams between sheets of drywall, one of the best means is Knauf gypsum putty. Depending on the purpose, one of the varieties of Knauf putty is used:
If sheets with a semicircular thinned edge (PLUK) are used, when working with Uniflot putty, sealing drywall seams with your own hands can be done without reinforcing tape .
The basis of these dry mixtures is gypsum powder, which includes plasticizers and modifiers that give each composition the appropriate qualities. For example, additives in the Fugen Hudro brand have a water-repellent effect.
Important! Gypsum putty is incompatible with surfaces made of chipboard, ceramic and stone cladding.
On the construction market you can find polymer putty that is more resistant to high humidity. This cannot always be taken as an advantage, since retaining moisture in a room does not always have a beneficial effect on the microclimate. If you seal the seams between sheets of drywall with gypsum putty, it allows you to better maintain the microclimatic conditions in the room. In addition, it has better vapor permeability, allowing the walls to “breathe”. However, if there is good ventilation in the room, these advantages do not play any role.
Oil-adhesive putty is absolutely not suitable for sealing seams, since it shrinks a lot.
Why is grinding needed?
The surface obtained after finishing drywall putty can hide imperfections invisible to the eye, which will appear during facial treatment. Therefore, grinding the resulting surface will create a perfectly flat surface. The operation is carried out after the surface has completely dried.
This will take from 4 to 6 days, depending on the temperature and humidity in the room. When drying the surface after puttying, drafts on the surface are not a problem. Therefore, you can open the windows.
The grinding operation is accompanied by a lot of dust. Therefore, you should use a respirator. After sanding and priming the surface, you can begin cladding.
When creating a design, you should understand that aesthetic design includes accuracy and professionalism in performing all work. Only then will the look be complete and pleasing to the eye. Plastering drywall is the most important step in creating a design.
Paper tape
It is recommended to reinforce the seams with Knauf paper tape with special fiber additives that increase strength. Each leading manufacturer offers its own version of the technology with the most suitable materials. Sheetrock and NextBuild are also popular brands. The presence of a groove in the middle of the tape makes it easier to bend the paper when finishing internal corner seams.
To avoid the formation of bubbles under the paper layer if there is insufficient putty, it is better to purchase tape with micro-perforation.
The tape for sealing may be different - sealing drywall seams with sickle is also practiced, but it should be borne in mind that it is inconvenient to use when processing internal corners. In addition, it has less strength compared to paper tape and is prone to stretching, so it is also not recommended to use it for transverse joints, only for longitudinal ones. The only advantage of serpyanka over paper tape is ease of use due to the self-adhesive layer.
For what purposes is the mesh used?
The mesh reduces the impact of vibration on the coating.
Made from glass fiber with a polyacrylic dispersion, it is used to avoid the appearance of cracks. The mesh for wall putty is inserted into the inner layer - this will help reduce the effect of vibration and reduce the deformation of the finish during mechanical impact.
It may happen that the putty from the mixture is prepared incorrectly and it peels off. In this case, a reinforcing mesh will come to the rescue - it will help retain the finish.
Technology for sealing seams between plasterboard sheets
The sequence of work will be as follows:
Working conditions: the room temperature should not be lower than 10°C, and the humidity should be within normal limits. Drafts are not allowed.
It is important that the container and tools are clean, otherwise the quality of the putty will decrease by 2 times, and its hardening will also accelerate. The properties of the solution are retained for no more than 40 minutes, and the required viscosity cannot be maintained by diluting with water, so small portions are prepared. After the putty mixture has hardened, the seam is rubbed with a float and sandpaper and primed again.
Sealing plasterboard seams on the ceiling and walls is done using the same technology. It’s just more difficult to process the ceiling, and all the defects are more noticeable.
Is grouting of joints necessary?
After the joints on the plasterboard wall have dried, subsequent grouting is carried out. This is what you need to do:
- The remaining stones from the mixture will interfere with subsequent work and may ultimately ruin the appearance of the room.
- Grouting must be done to achieve a smooth surface.
Grouting is done on a dry surface with sandpaper or a sanding machine. For convenience, so that all defects are visible, use a lamp.
After the work, the surface remains smooth and clean.
Do I need to putty drywall?
Nobody wants to do extra work. In addition, putty is a long, difficult process that takes a lot of time. A reasonable question arises: why putty on the flat surface of plasterboard sheets. Maybe you can do without it during finishing? With some types of finishing it is possible, but not with all.
You should always seal sheet joints, corners and screw heads. For any type of finish. Be sure to putty the gypsum board before painting. The surface of the drywall is far from ideal, and new irregularities are added during transportation and installation. If you paint the surface without first leveling, they will all be clearly visible, especially if there is at least a slight degree of gloss.
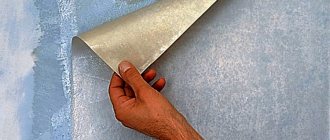
Preparing drywall for wallpapering - you can only putty the seams, then prime the surface
The Knauf company, one of the leaders in the production of drywall, allows the entire surface of the sheets not to be puttied under tiles and wallpaper. Only joints, corners and screws. No one uses putty for laying tiles, but yes, for wallpaper. And all because wallpaper pasted without pre-treatment sometimes comes off along with the cardboard and sometimes even down to the plaster. So the second time, putty is simply inevitable.
You can avoid puttingty the entire surface of the sheet by using a primer. In this case, the primer is water-dispersed acrylic paint diluted with water. It creates a film on the surface with which the glue interacts well, but this film also prevents the cardboard from being damaged when the wallpaper is torn off.
Before painting, it is necessary to putty the drywall completely, and until it is in perfect condition.
So, it is absolutely necessary to putty the drywall before painting, preferably before wallpapering (at least in one layer) and only seal the screws and seams under the tiles.
Types of putty mixtures
Building materials stores offer a wide variety of mixtures for gypsum board putty. Among them you can find both universal compositions and those designed for a specific type of wall surface. Their cost is also different, and therefore making the right choice is not so easy, especially if you have no experience in performing finishing work.
Existing putty compositions differ in purpose, degree of readiness for use, and components included in them. Let's consider which putty is best suited for drywall, based on this general classification.
By purpose
There are 3 types of putties according to the method of their application:
- starting, for initial, often multi-layer, leveling;
- finishing, for final finishing of wall surfaces;
- universal, for use at any stage of work.
The presence of relatively deep joining seams requires the initial application of putty in 2-3 layers, after which final finishing leveling is already permissible.
Starting compositions differ in the content of coarse-grained components and fibers. This material can be applied in a thicker layer, it almost does not shrink and does not form cracks when drying.
Finishing mixtures of finer grinding are applied in a layer whose thickness does not exceed 1 mm, and are easily rubbed over with a plaster mesh before painting. Recommended option.
Universal ones may seem more convenient, but they are more expensive and when sealing large cracks and depressions in the seams, they will have to be applied 3-4 times, which will take more time and increase repair costs.
When ready for use
Putties are sold in the form of ready-to-use formulations or in the form of a dry fine powder , which must be diluted with water before use. In the first case, the putty can be immediately applied to the surface without additional preliminary preparations, but such material has a limited shelf life and must be completely used after opening the container.
Dry mixtures have a long shelf life and can be used in small portions, saving the remainder for subsequent work. In addition, ready-to-use putties are more expensive due to special sealed containers, packaging in small volumes and additional factory labor costs. Therefore, ready-to-use material is used to a limited extent, when performing minor repairs.
By composition
Manufacturers of building materials sell 3 types of putties with different binder bases:
- gypsum;
- cement;
- polymer.
Each material has its own advantages and disadvantages, which influence the correct choice in the matter of drywall processing.
Gypsum mixtures
Most finishers prefer to use this option for gypsum board putty, since gypsum dries quickly and adheres well to fragile sheet materials. In addition, gypsum mixtures have excellent adhesion and provide reliable adhesion to thick, dry paper that actively absorbs moisture.
The most important qualities of gypsum putty are environmental friendliness, durability and low cost. When applied in thin layers, it almost does not shrink when dried and does not form cracks. It is characterized by high plasticity and is easy to apply to the surface.
The main disadvantage of gypsum materials is the already mentioned ability to actively absorb moisture. Therefore, they cannot be used for finishing kitchens, bathrooms, toilets, showers, loggias, balconies and other rooms with high air humidity.
Cement based
Cement putties belong to the category of moisture-resistant materials. They tolerate temperature changes well and have no restrictions on the place of use. Among the main disadvantages, it should be noted the heterogeneity of application, the increased moisture content in the working composition and the lengthy drying process.
Therefore, cement putties have to be applied in several thin layers, which takes a lot of time and delays the repair. In addition, the gray color of the mixture may show through light paints, which means more material may be needed for decorative finishing.
Polymer
Polymer-based putties are a universal material suitable for all types of walls and ceilings. Environmental friendliness, moisture resistance, plasticity, strength and durability allow the use of polymer putties in any room. The material does not shrink when dried and does not lead to the formation of cracks even when applied in a thick layer.
The main disadvantage of polymer putties is their high cost. But if your financial capabilities allow it, then it is recommended to choose just such a material to level the surface of plasterboard sheets.
Primer for drywall: why, what and when
The primer performs two different functions. The first is that it improves the adhesion (adhesion) of two materials. As a result, when puttying, the chances of bubbles forming and material peeling are reduced. The second function is that it evens out absorbency. The result is less material consumption, and when puttying, a more even surface. So it is not advisable to skip the primer.
In theory, priming during finishing work should be done before each new operation. For example, before puttying, plasterboard sheets need to be primed to improve adhesion to the putty. Before painting or wallpapering - to reduce the consumption of paint and glue. You also need a primer before applying the finishing layer - the starting layer has to be leveled, which is why the surface turns out dusty. Without primer treatment, the finishing layer does not apply well, rolls off and may even fall off.
Primer for drywall from Ceresit is also suitable for interior work.
What primers are needed? Depends on the stage and the type of finishing material:
To summarize, it is worth saying that priming is a necessary operation. It allows you to get good results and reduce material consumption.
Handling uneven sheet edges
If the sheet has been cut or broken and then trimmed along the edge, it must be prepared before use. Why, how and why - we will answer further.
If you pay attention, at the edges of all gypsum sheets, you can notice a rounding, or a decrease in the thickness of the sheet. This was done for a reason, but for a very specific purpose - sealing sheet joints
Putty is applied to the recess that is created by connecting two sheets with the edges when leveling. It forms an even and strong layer if it “extends” a little over the sheet area, and is not just located at the joint itself. To make such a recess, you need to prepare cut plasterboard parts.
It's very simple - you need a drywall plane or a sharp knife. Either one or the other, you need to chamfer along the edge of the part at an angle of 45 degrees.
Now, if you place such a part against another, even with a factory edge, a recess will be formed, which will be filled with putty mixture during alignment, and as a result, the seam will be stronger.
Technology: sequence of work
After the gypsum board sheets are fixed to the frame, it is time to prepare the drywall for finishing. Let's consider the case with a full cycle - for painting. In this case, the drywall must be puttied in at least two layers. For other types of finishing that are less demanding on surface quality, we simply remove unnecessary steps. The order of work is as follows:
Do-it-yourself drywall putty - learning the nuances
A few words about which putty is best to use for gypsum board. Any one will do - gypsum or polymer based (latex). Polymer putties are usually finishing - they provide a very thin layer and a smooth surface. There are both starting and finishing plaster ones. Difference in particle size. You can use any, as long as the quality is good.
There are two forms of drywall putty - dry in bags and diluted in buckets. Before use, dry mixture must be diluted with water in the indicated proportions and stirred until lumps dissolve. Compositions in buckets are already ready for use, but are more expensive. But they are guaranteed to have no lumps.
How to putty GVL for painting and wallpaper:
Preparation using the priming method will improve the binding properties of the putty with GVL. You can choose a primer from any company with special markings for surfaces with absorbent properties. Apply the liquid with a roller, paying special attention to joints and corners. After drying, you can proceed to the main stage;
First you need to cover the places where the gypsum fiber board is glued and the fastenings. Before starting work, you need to check all protruding elements by hand, if you need to deepen the screws as much as possible. Self-adhesive mesh is glued to the seams, it prevents cracks and helps it stay better in the seams. Dilute the putty of your choice according to the technology. Using a spatula, completely fill the joints with putty mixture, a layer such as to hide the mesh. In the corners, first one side is processed, then the other. The recesses from the fastenings are covered with a cross. After drying, it is advisable to repeat the procedure. The recommended thickness of each layer is no more than one and a half millimeters. Of course, there will be small unevenness and roughness that needs to be eliminated with a sanding device on which a sanding mesh of different grain sizes is attached. There is a misconception that this is where you can finish the putty if you have chosen thick vinyl or non-woven wallpaper for wall decoration. In fact, room lighting can highlight bad places, so try to go over the putty again;;
for the final layer of putty you will need a special high-tech polymer mixture, which will create the thinnest layer, less than one millimeter. The last layer is applied most carefully and is close to ideal. Any connection must be absolutely inconspicuous under any conditions. This work is best done with different tools: wide and narrow spatulas. Putty is applied first to the second and all excess is removed. Using a wide spatula, spread the mixture over the GVL from the previous stroke to the dry area. Professional craftsmen are able to apply the most ordinary, but high-quality putty mixture so carefully that there is no need to do anything else. Use a large spatula to remove small roughness after drying.
In any case, in a building materials store you will think about which putty is best for gypsum plasterboard. The choice of mixtures for these purposes depends on the price and manufacturer.
Secrets of GVL putty
When you decide to wallpaper a room, you need to remember that you need to buy rolls with a reserve. They will stick firmly to the walls if there were no drafts in the room when gluing and the windows were tightly closed.
So, there are three stages: processing of seams and the final one. When decorating with thin paper wallpaper for painting, it is recommended to putty the final putty in two layers and sand with a fine sanding mesh.
If the choice of interior decoration falls on gypsum fiber sheets or slabs, then the work life is noticeably reduced. This leads to undoubted savings not only in time, reduction in manual labor, but also saves money.
There are various options for attaching it to walls. It can be placed on metal profiles, on wooden beams, or simply glued with special glue. In this way, quickly and less expensively than leveling the walls with plaster and putty, you can make the walls even. And they are almost ready for wallpapering and painting, as well as tiling or tiling.
Gypsum fiber sheets or slabs are a fairly universal building material, since they can easily be used to decorate walls, ceilings, floors, slopes, and even make external cladding of buildings for various purposes.
Experienced professionals strongly recommend applying a coat of primer after each job. Do not forget that it must be special, not destroying the glue at the joints. The primer will not be superfluous before puttying. And when it is completely dry, you can treat it again with a primer, and then any wallpaper, be it paper, non-woven, photo tray and others, will adhere firmly to a perfectly flat surface.
Also, based on experience, gypsum fiber sheets shine through the wallpaper. And it won’t be an option to simply putty the joints and the deepening places of the screws. But if you decide to save money, then you can use a thick white primer to even out the color of the gypsum plasterboard under the wallpaper.
Before directly covering with paint or wallpaper, it is advisable to sand the dried putty well, since all irregularities will be noticeable through the wallpaper, no matter what material it is made of.
Gypsum fiber sheets (GVL) are an excellent construction and finishing material that has found wide application in modern technologies and flooring. We will tell you how to build a partition from plasterboard and what it means to decorate gypsum fiber board walls with your own hands.
Primer coating
Before you putty the drywall, prime the surface. Any primer is applied to a dry, clean base. Therefore, we first remove dirt from the surface and remove dust (you can use a vacuum cleaner or a slightly damp cloth). After this, prepare the soil according to the instructions (sometimes you need to dilute it with water, sometimes you just need to stir it), pour it into a container and apply it with a brush or roller.
Applying a primer: choose a method convenient for you
Drywall primer is available for dry and wet areas. For the bathroom and kitchen, choose soil for wet rooms; for the rest, you can use any soil. When choosing soil, pay attention to the presence of antibacterial components. They prevent the development of mold and fungi. This is especially true for the kitchen and bathroom.
| Name | Consumption | Purpose | Drying time | Additional properties | Price |
| Penetrating primer Optimum (10 l) | 6-8 sq.m/l | For priming brick, concrete, plasterboard in dry rooms. | 30-40 min | 600 rub for 10 kg | |
| GLIMS Grunt (10 l) | 5 sq.m/l | For rooms with normal and high humidity | 30 minutes | Anti-fungal and anti-mold additives | 600 rubles for 10 l |
| Tex Universal acrylate primer | 5-14 sq.m/l | For priming porous surfaces, including plasterboard and putty surfaces | 30-40 min | For dry rooms and rooms with high humidity | 650 rubles for 10 l |
| Internal primer Prospector 10l | 5-10 sq.m/l | For priming porous surfaces, including plasterboard and putty surfaces | 60 min | Anti-fungal and anti-mold additives | 350-400 rubles per 10 l |
| Feidal Tiefgrund LF 10 l | 10 sq.m./l | For highly absorbent surfaces, including drywall | quick-drying | For indoor and outdoor use, frost-resistant | 850 rub for 10 l |
Usually, for priming drywall, it is enough to apply the composition in one layer, but in the kitchen or bathroom you can use two: to guarantee the result. After the soil has dried (the time indicated in the instructions), you can proceed to the next stage.
Preparatory operations
List of works:
- Pay attention to the reliability of fixing the screws in the slabs.
- If protrusions of fasteners and other elements are detected, eliminate this deficiency.
- Processing gypsum board seams with sandpaper.
- Dry and ventilate the room.
- Provide a temperature of at least 10 0 .
- Prepare tools and containers for diluting the mixture.
Don't forget about your own safety:
- Wear special clothing and shoes.
- Despite the fact that drywall putty is safe, you still need to ensure that your hands are protected, since the components it contains can cause the skin to become very dry.
- Prepare safety glasses.
- When performing work using scaffolding, check its stability.
- You cannot work from a ladder, as vertical forces may be applied.
- Working alone is not recommended, it is inconvenient and unsafe.
Sealing screws and seams
For seams there are special compounds Knauf-Fugen, Knauf Uniflot, Fugenfuller and their analogues. After the soil has dried, dilute the putty to the consistency of thick sour cream. Please note that these putties dry quickly, so dilute a small amount at a time.
We take a small spatula, apply the composition to the places where the screws are installed, and remove the excess. There should be just enough putty in this place so that the surface is even. This way we go through all the screws. They can be sealed parallel to the seams, or they can be sealed first. It doesn't matter.
The principle of working with putty is that a roller of the compound is placed on the edge of the spatula, then it is stretched in the right place
There are two types of drywall joints. Along the long side of the gypsum board, the edges are uneven - for easier sealing of this joint. But the sheets are also connected in height, where there are no ledges. You also have to cut the sheets and the joint is also end-to-end. Such connections require special technology, which will be discussed below.
Vertical joints
When puttingtying vertical joints of drywall with normal factory edges, they are first carefully filled and then glued.
After filling, while the composition is still wet, it is glued with a sickle mesh or paper reinforcing tape. This is necessary so that cracks do not form at the joints. If tape is used, it is torn into the required pieces and soaked in clean water for 10 minutes (while the seam is being filled).
The tape is recessed to the required distance
Having filled the seam, take out the tape, hold it between your fingers, remove excess water, and glue it to the seam. Then take a spatula 8 cm wide (this is a must) and press the tape below the surface of the gypsum board. She “sits” on one of the factory ledges. They begin to press from the middle to the edges. When pressed, the putty is squeezed out from under the tape; we collect it. As a result, if you apply a wide, hard spatula (at least 20 cm wide) to the surface, you can see that the tape is below the surface of the cardboard. Then they go through putty again, leveling the joint level with the surface.
Trimmed seams
It is better to putty plasterboard in places of horizontal joints - where two slabs are connected or on vertical ones, but without edges, after pre-treatment. First, the surface is moistened with water - dip the brush in water and coat the joint well. Walk several times until the plaster gets wet. Then use a sharp knife to cut grooves at an angle of 45°. These joints can be treated before priming. It's even more convenient.
Preparing seams for putty
We coat the prepared joints with primer. In this case, it is more convenient to use a brush. After drying, fill the seam with a composition for puttying drywall joints. It is more convenient to work with spatulas 10 cm wide and hard 20 cm. Apply the composition with a small one, and remove the excess with a large one. Fill well, pressing the composition into the seam. If you did everything correctly, a small roller will form, slightly protruding above the surface.
Once again we go through the seam, applying fresh putty about 0.5 mm thick, take the soaked reinforcing tape and glue it to this compound. Use a spatula 8 cm wide and press the tape well onto the surface, squeezing out the excess putty from underneath it.
Puttying of cut seams on gypsum boards
In this case, a wave of paper is formed (you can see it in the photo), we make sure that it does not wrinkle, we catch it to the end, where it straightens out. Remove excess solution into the tape and adjacent area of the sheet. And the last stage - again take the putty and coat the pasted tape on top with a thin layer. We make this layer as thin as possible, as they say - “to tear off”. Actually, we stretch the remaining putty in a very thin layer.
Second technology: first tape then putty
There is a second technology - first, serpyanka or paper reinforcing tape is glued onto the plaster, then it is puttied. This works faster, but the disadvantage is the voids that remain under the tape. In these places, the wallpaper may wrinkle or the putty or decorative plaster may crack.
This is how you stick serpyanka onto drywall
They also use sickle mesh instead of paper tape. Serpyanka is more difficult to work with - it is rigid and its edges often stick out from the mortar. To make it a little easier, the mesh is pre-glued, and after the glue has completely dried, it is puttied. In order not to think about glue and speed up the work, use a self-adhesive serpyanka (there is such a thing).
An example of puttying a seam with serpyanka
But, anyway, it’s more difficult to putty drywall - its surface is uneven, the spatula “jumps” on the fibers and you get a small wave that is not at all easy to smooth out.
Repairing holes in drywall ceilings
The technology for constructing a frame for large holes in drywall is the same for both vertical and horizontal surfaces.
Therefore, novice craftsmen will not have the question of how to repair a hole in the drywall on the ceiling. If you don’t have a drill and a screwdriver at hand, but you still have a bottle of construction foam left over from the repair, you can use it to fill the hole in the ceiling and form a stable base. Before filling the hole with foam, it is necessary to clean the inner edges of dust to ensure adhesion of the foam to the underside of the drywall. After hardening, the foam is cut flush with the plane and puttied. The method works on fragments up to 15 cm or at a short distance to the rough ceiling.
When repairing ceiling defects caused by soaking of gypsum boards, it is worth remembering that the ceiling should be thoroughly dried before starting work. Otherwise, mold will grow under the drywall, which has a devastating effect on health.
The listed methods are not the only possible ones. After all, drywall is a universal material that can work in conjunction with a wide variety of mixtures and solutions. How to repair a hole in a plasterboard wall? - ingenuity and imagination will prompt the home craftsman with his own ideas that will work just as well.
External and internal corners
External and internal corners on plasterboard walls and partitions are made using:
There are different perforated corners, but it is more convenient to work with the metal corner Shitrok
Paper and serpyanka are most often used to decorate internal corners - the junction of walls, as well as walls and ceilings. The technology is similar to seam sealing. A certain amount of putty is applied to the corner, paper or sickle is glued onto it, the reinforcing strip is pressed into the composition with a narrow spatula, and excess putty is removed. After this, they go through the corner again, applying a thin layer of putty on top.
Perforated corners are used to design external corners - slopes, protrusions, etc. First, a piece of the required length is cut. The metal is very thin, it can be cut even with ordinary large scissors, but if you have metal scissors, the work is easier. Edges are cut at an angle of 45° or less, rather than at 90°. So, when puttingtying drywall, the edge will not curl up.
Decorating the outer corners of plasterboard walls using a perforated corner
Putty is applied to the outer corner on both sides in small islands approximately every 10 cm (can be done in a checkerboard pattern). A perforated corner is pressed into the solution, its installation is checked whether it is vertical or horizontal, and adjusted. Use a spatula to pick up excess mortar, aligning the edges in one plane with the surface of the sheet. The installed corner is left for some time until the putty dries, after which it is sanded and puttyed again if necessary.
What is different about the metal corner Sheetrock? Thin strips of metal are applied to a paper base. They are more rigid than simple reinforcing paper, but it is more convenient to work with them than with conventional perforated ones, since due to the presence of paper the transition to plane is smoother.
Construction of a partition
Structure and composition
Before starting work, we should determine what elements our partition will consist of.
Structure and composition of plasterboard walls:
- Frame made of galvanized metal profile
. Includes the following elements: rack profile (PS) for vertical frame parts and guide profile (PN) - for horizontal connections of the wall to the ceiling and floor; - Soundproofing filler
. For this purpose, non-flammable polystyrene foam or mineral wool (glass wool) slabs are usually used; - The frame covering is double-sided
. It is carried out with gypsum fiber sheets (GVL) by fixing them to the frame posts with self-tapping screws on both sides of the structure; - Filling seams and joints
. For these purposes, fast-hardening putties for seams such as KnaufFugenfuller or KnaufUniflot are used, as well as fiberglass reinforcement tape, which is popularly called “serpyanka”; - Leveling putty on the wall surface
. It is necessary to create a flat plane on the surface of the structure, it is performed by applying a solution to the walls in a thin, uniform layer; - Finishing putty
. Necessary if you plan to paint the walls. It is carried out with any finishing gypsum mixture, which is applied in a thin layer, and after drying, sanded with an abrasive float or emery cloth; - Finishing
. This can be wallpaper, panels, decorative plasters and other facing coatings. In this case, finishing putty is not performed.
To construct the frame, the following elements are used: PS and PN profiles. They come in different sizes:
| Sketch of PS profile section | Marking | Sketch of the section of the PN profile | Marking | Aspect ratio, axb, mm | |
| PS 50/50 | 50x50 | Mon 50/40 | 50x40 | ||
| PS 65/50 | 65x50 | PN 65/40 | 65x40 | ||
| PS 75/50 | 75x50 | PN 75/40 | 75x40 | ||
| PS 100/50 | 100x50 | PN 100/40 | 100x40 |
As you can see, in different brands of profiles only the size of side a changes, while side b remains unchanged. Therefore, when purchasing a set of profile elements, make sure that the a-dimension of the rack and guide rails is the same, otherwise their joint installation will be impossible.
Depending on the height of the structure, profiles of different sizes are used (side size a, mm is indicated):
- Up to 3 meters – 65;
- From 3 to 4.5 meters – 75;
- Over 4.5 meters – 100.
The maximum height of partitions that can be built using this technology is 5 meters. The work can also use auxiliary profiles with a side size of a = 50 mm for mounting horizontal jumpers, framing holes, etc.
As sound insulation, you can use polystyrene foam boards with a fire retardant with a thickness of 50 mm, as well as mineral wool boards with a thickness of 50–100 mm. These products fill the gap between the frame skins.
To cut GVL sheets, use a construction knife (for longitudinal and transverse straight cuts), a hacksaw for GVL (for cutting rectangular holes) and a drill with a circular saw (for cutting round holes with a diameter of up to 80 mm).
Important! Before installation, the sheets must be kept in the room where the work is planned for at least 4 days so that they acquire the same humidity.
Frame assembly
The instructions for assembling the metal frame are simple and clear:
- Using a coated cord on the floor, we beat off the line of the partition according to the project. The line must be strictly perpendicular to the opposite walls. Then, using a plumb line, we transfer the markings to the walls and ceiling;
- We take the PN and cut out two sections along the length of the line on the floor, cover them with sealing tape and fix them along the floor and ceiling using BS-K 8x50 mm dowels and galvanized screws 4.2x51 mm with a pitch of 50 cm, but not less than 3 per section profile. We make sure that the parts are located exactly according to the markings;
- We take the PS and cut out two sections along the height of the room minus 5 - 10 mm, which we cover with sealing tape and fix along the walls between the guides. The screw installation pitch is 100 cm, but not less than 3 per section of the rail;
- Next, we place the PS on the sides of the doorway, which we reinforce with wooden blocks inserted inside the profile. To work, we use a plumb line or a level; we connect the parts using special fasteners in the profile structure or galvanized self-tapping screws 4.2x14 mm.
- We make the upper border of the doorway from a section of PN, which we reinforce with a vertical crossbar (or two) made of PS installed between it and the ceiling guide;
- We install the PS with a pitch of 402 mm along the entire partition, except for the doorway. We maintain verticality, if the intended joint of the sheets is not on the PS, then we install an additional profile in this place.
We connect the profiles with screws after the PS is inserted into the PN:
Sheathing and sound insulation
After completing the assembly of the frame, it should be sheathed with gypsum fiber sheets. To do this, cut out the sheets and cut out the necessary parts. If the vertical size of the sheet does not overlap the height of the structure, then horizontal jumpers from smaller PN should be installed at the joining point, or holes for joining should be cut in the normal profile.
The sheets are attached to the frame with double-threaded self-tapping screws with a self-countersinking head measuring 3.9x30 mm in increments of 30 cm at a distance of 12 mm from the edge of the gypsum sheet. The length of the screw should allow it to extend into the profile by 1 cm. A gap of 10 mm is left between the sheets and the enclosing structures, and 5 mm between adjacent sheets.
Fastening is carried out from the corner in two perpendicular directions: vertical and horizontal:
After covering one side, the structure is filled with sheets of mineral wool, inserting them between the posts so that they are slightly compressed by them and do not fall. Then the other side of the partition is covered, thereby covering the soundproofing layer.
Important! Joining of sheets (horizontal or vertical) is carried out only on the profile. If there is no profile at the junction of adjacent gypsum fiber lines, it must be added.
Sanding seams and corners
If the layer is well leveled when sealing seams on drywall, sanding can be kept to a minimum. Why is it better to sand less? Because firstly, it’s long, and secondly, it’s dusty. Moreover, the dust is very fine, floats in the air for a long time and rises again from any movement. To reduce the amount of flying dust, wet rags, wet sawdust, etc. can be placed on the floor. Doors leading out of the room are covered with a wet cloth; it should be larger than the size of the door - so that dust does not fly into other rooms.
To begin with, you can go over it with a sharp, even spatula and cut off all the most protruding irregularities. Next is the sanding process. Since corners and seams at this stage do not need to be sanded to perfect smoothness, take a sanding mesh with a mesh size of 180-200 and a wooden block. A mesh is attached to the block (you can use staples from a construction stapler, but the staples should not stick out). This device levels the surface. When working, it is advisable to highlight it with oblique light - this way all the irregularities are more visible. But you can’t putty plasterboard under wallpaper so carefully.
There are special holders for the mesh, but you can get by with a block
One thing - it’s better to grind in a respirator and safety glasses. Gloves will be a good idea. The dust is very fine and penetrates literally everywhere. After the seams and corners are sanded, the surface is primed again. Moreover, all of it, since dust has also settled on the untreated areas, and it worsens adhesion.
The most inconvenient places for puttying and sanding are the inner corners. For the secrets of fast, high-quality grinding of corners, watch the following video.
How to use
The reinforcing capabilities of painting grids are maximized when they are placed inside the processing layer intended for leveling. The probability of crack formation decreases in proportion to the approach of the mesh to the outer layer of the surface. Technological process for reinforcing the putty layer:
- Prime the plastered wall.
- After the primer has hardened, apply the putty base.
- While the putty is wet, place a fiberglass mesh on the wall and press it into the solution with a tool (trowel).
- Cover the network with an additional layer of putty, leveling it with a wide spatula.
When the reinforced layer has hardened, it is time to process it with a sanding mesh or sandpaper. In order to achieve an ideal aesthetic effect, a finishing compound is applied to the second layer of putty, which, after hardening, is sanded with fine-grain emery cloth. A completely flat plastered wall is coated with a finishing primer, after which it has hardened, painting can begin.
The technology for using mesh with an adhesive layer on drywall is somewhat different:
- The joining boundaries are expanded, cleaned and primed.
- Serpyanka is glued to the frozen joint.
- Putty strokes are applied with force so that the mass squeezes through the mesh and fills the space between the sheets of drywall.
- Without interruption, apply the second layer of putty, gradually leveling it with a spatula.
After sanding the surface and making sure that the primer has completely polymerized, you can begin painting and wallpapering.
The web is also initially glued to the primed surface: the glue is spread with a roller, the strips of fiberglass are leveled and pressed with the same adhesive roller. The putty mixture is applied after the glue has completely hardened. The following steps are identical to previous finishing technologies: sanding and priming.
Note! The next mesh for puttying fiberglass walls should overlap the previous one by at least 5 cm.
In order to reinforce the putty layer at the outer corners of the openings, you can use a specially designed corner with attached fiberglass. The corner forms an auxiliary barrier against careless chipping as a result of severe mechanical damage by a person carelessly leaning on these areas. Internal corners are often reinforced with a standard grille or fiberglass.
Types of sheet edges and types of joints
The transverse edge of all types of gypsum boards is the same, but the longitudinal edge has some differences:
- Straight edge. Such GC sheets are marked PC. As a rule, such finishing of the end of the slab is done on gypsum fiber sheets intended for rough finishing, so the joints on them are rarely sealed.
- Semicircular edge (PLUK). On the back side of the sheets the edge is straight, only the edge on the front side is rounded; this treatment is most often found on gypsum board sheets. When sealing seams in sheets with a semicircular edge, a serpyanka is usually used.
- Beveled edge (SC). It occurs as often as the semicircular one. The seams between sheets with beveled rolling are sealed in several stages and this process is quite labor-intensive.
- Rounded edge (CR). It is less common on gypsum board sheets. Sealing joints between rounded edges is possible without the use of reinforcing tapes.
- Folded edge (FC). As a rule, it is found on gypsum fiber sheets (gypsum fiber), which are intended for rough finishing.
In addition to dividing into varieties, different types of drywall have different types of edges
Selection of materials and tools
When starting any work, it is better to prepare everything in advance
You need to pay attention to the tools, the minimum set of which is as follows:
- A set of spatulas - it is better to choose three main ones: wide, medium and narrow. The first one will do the least amount of work, but it is very convenient for smoothing out seams.
- If you wish, you can add a falcon - a special device for working with putty. It is a flat plate with a handle. It is convenient to take the solution from its surface. Although, a wide spatula will perfectly fill its role.
- Level.
- Drill with mixer attachment.
- Brush and roller for primer.
- Block and sandpaper.
- Construction knife.
Tools for carrying out work on sealing drywall seams
We must not forget about the materials, which should be in the required quantity:
- Two types of putty compositions: • Starter. They will be used to seal the drywall seams. • Finish. This mixture will not be used to seal drywall joints. It is needed to apply a control layer that will make the surface perfectly smooth.
- Primer mixture. It is better to prefer acrylic.
- Special tape - mesh (serpyanka). It will be used to seal the joints of the gypsum boards. And it is needed so that the putty does not cause cracks in the future.
- We must not forget that there are also corner seams. Therefore, it is better to have special perforated elements. And also reinforcing tape for corners.
Materials required for sealing joints of drywall sheets
Only by putting everything together can we say that the time has come to do the work yourself. The sealing of drywall joints should not be interrupted due to the absence of something.
Advice! When choosing a putty, they focus on the final decorative coating. So, you can choose a cheaper dry mixture for wallpaper. In any case, it is better to give preference to gypsum-based putty. This is a reliable composition that is well suited for such work.
Conditions for carrying out work
There are a number of certain conditions, the use of which contributes to a positive final result:
- First of all, the temperature inside the room must be observed. This indicator should not be less than +10°C. In addition, the temperature level must be maintained throughout the entire period of work, preventing the possibility of temperature changes.
- Drafts are prohibited. Under no circumstances should windows and doors be opened while sealing joints.
- There are some conditions regarding indoor moisture levels that must be observed. For this reason, you can begin installing drywall and sealing its seams only after completing the pouring of the floor screed, leveling the ceiling and other wet work. This is due to the fact that increased dampness is the reason why the putty will not adhere well enough to the sheets of finishing material.
- Fixing drywall to a metal frame must be carried out in accordance with all rules. If the fastening is not strong enough, peeling of the sheets from the sheathing may occur, which in turn will lead to the formation of cracks at the joints even under light loads. In this situation, neither the serpyanka nor the putty mixture will help.
Working with polyester mass
The subsequent processing of walls with mesh directly depends on the quality of the putty on the walls. For this, builders often use a polyester mixture, which can be purchased in specialized stores. It includes substances that have a positive effect on the durability of the coating. At the same time, the total cost of construction work increases slightly.
Professionals use polyester mass for the following purposes:
- sealing cracks and leveling the surface:
- final finishing;
- giving smoothness.
Using the paste in some cases allows you to do without sanding and grouting. The mixture is firmly connected to the surface of the walls and, if necessary, can be easily sanded.
There are several types of finishes that require a polyester blend:
- with aluminum powder;
- with universal coating;
- pneumatic spray;
- based on fiberglass, etc.