SHARE ON SOCIAL NETWORKS
FacebookTwitterOkGoogle+PinterestVk
This article discusses beds for the lazy: photos of the easiest structures to make for those who want to get a neat garden with a minimum of effort, the most common materials and technologies for creating structures based on them. The reader will learn how to combine vegetable crops in one bed and prepare the soil for planting cucumbers. The article contains practical recommendations for beginning summer residents.
Proper organization of garden beds will help save time and effort when planting and harvesting crops.
High or raised
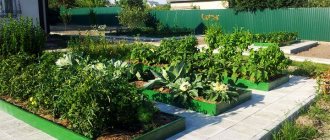
One of the most popular beds today. It is also called a box bed. It differs from the classic ones in that the ground in it is raised above the soil level. The earth is poured from 15 to 80 cm in height. The box acts as a “limiter” that prevents the soil from spilling out and being washed away. It is made from slate, logs, brick, plastic and other materials. Another option is to buy special metal shields. They are coated with a water-repellent composition and are easily assembled into a durable structure.
How it’s done: a box is built in a designated area. A protective mesh against rodents is placed at the bottom, then a layer of organic matter is poured. Foliage, sawdust, tops, rotted manure, and chopped branches are suitable for these purposes. Then the top layer is laid - a fertile soil mixture.
Pros:
- high productivity, which increases in a box bed by 1.5-2 times;
- low labor costs: the area for digging and weeding is reduced;
- rapid heating of the soil, which is especially important in the spring for early seedlings;
- use of areas unsuitable for farming for garden beds;
- easier care of paths: they can be covered with decorative stones or grass can be cut without fear of damaging garden crops.
- the ability to create ideal conditions for each culture separately.
Minuses:
- rapid drying of the soil;
- constant feeding of plants due to limited space;
- building a box and filling it with earth requires large physical costs and financial investments;
- good heating of the soil in the box causes active bolting in some crops, for example, spinach and garlic.
Application of herbicides
One of the most controversial methods of weed control allows in some cases not only not to weed the beds, but also to almost completely get rid of weeds for a long time (up to 2-3 seasons).
On the one hand, it is highly effective, however, the chemicals used are poisons and, despite all precautions, end up in the soil in any case. Whether the risk from the negative consequences of such a method of combating with the result is comparable is up to everyone to decide for themselves; however, most amateur gardeners do not recommend using herbicides to control weeds. Weed-free beds that don’t need to be weeded are sometimes not worth risking your health. On the other hand, currently produced herbicides are much less toxic than those that were used 2-3 decades ago, and most large agricultural enterprises use them in their production processes. It is also necessary to know that there are a number of plants that are almost completely immune to the effects of herbicides.
Traditionally, herbicides are divided into two classes: most are applied to the soil and enter the weeds through the root system; others are used by spraying, that is, they enter through the leaves. For small farms it is preferable to use the second group. As a rule, they have a short decay time and do not pollute the soil by accumulating in it.
Pit bed
Well suited for growing pumpkins, corn, and zucchini. To make it, a hole is dug and filled with soil mixture. A protective layer against weeds is laid around the edges.
How to do it: dig a hole measuring 1x1 m2, 2 shovels deep. After this, the hole is filled in layers of: sunflower husks, 1 wheelbarrow of manure, 1 wheelbarrow of compost. The area around the pit is covered with burlap to improve the water regime. The edges of the burlap are sprinkled with earth. Sheets of cardboard are laid on top of the burlap, with hay on top. This cover will protect against weeds.
Pros:
- ease of execution;
- does not require large budget investments;
- Easy care: all you need is to water the plants once a week.
Minuses:
- Not suitable for all garden crops.
Application of ethanol
This interesting chemical method of weed control was tested about a hundred years ago during Prohibition in the USA. It consists of the following: 1-2 months before the start of sowing, the soil is watered with a 5% solution of ethyl alcohol in water. Any alcoholic beverage can be used as a source of alcohol. Taking into account the concentration of alcohol in vodka, it turns out to be 1 bottle of vodka per 30 liters of water. Ethanol accelerates seed germination processes, which leads to rapid emergence of young weed shoots. After this, the beds need to be weeded, but this process will not be labor-intensive - young weeds do not have the strength of adult plants and can be easily removed.
Pyramid
A new product that has recently appeared on gardeners’ plots. It is made from several boxes of different diameters, arranged according to the principle of a pyramid. It can also be a solid structure in the form of a pyramid with shelves on which plants are placed. It looks like a multi-faceted pyramid. Cucumbers, beans, and peas grow best on it. You can also grow greens, flowers, and herbs. Reviews from summer residents indicate that it is convenient to pick strawberries from such “pyramids.”
How to do it:
A pyramid is built from planks. The levels are then filled with earth. In this case, you need to start from the lower parts of the structure. After this, the soil is lightly compacted and the plants are planted.
Pros:
- space saving: pyramids are an ideal option for small areas where there is a shortage of land;
- beautiful appearance: a pyramid with vegetables and herbs, flowers and berries can become an aesthetic decoration of the site;
- purity of fruits: strawberries, cucumbers and beans do not lie on the ground, but hang from the shelves of the pyramid, therefore they always remain clean and attractive, and do not rot from contact with the ground.
Minuses:
- not every gardener can make such a design.
Digging up the soil before planting
Oddly enough, but carrying out this procedure can significantly (by about 3/4) reduce the presence of weeds in the beds.
Despite the laboriousness of this process, it is one of the few that results in the destruction of the root system of perennial weeds. If no economic crop has grown in the area being dug up for the last year and it has been completely “given over” to the power of weeds, its labor intensity increases significantly - after all, it is necessary not only to dig up the soil, but also to remove the remnants of the root systems of weeds from it. Some amateur gardeners use a pitchfork rather than a shovel when digging early. This approach undoubtedly reduces the labor intensity of the process, but does not guarantee the destruction of all rhizomes and the beds will have to be weeded frequently during the process of growing garden crops. Similar results are obtained if you dig using a walk-behind tractor or a walk-behind tractor. However, if such areas contain weeds with a deep root system (for example, wormwood or burdock), then the mechanical method is naturally much more effective than a conventional shovel.
Narrow
It is considered one of the most productive modern beds. An unusual idea comes from American agricultural expert Jacob Mittlider. He suggested making the beds narrow and the passages between them wide. According to the scientist, the plant receives only 40% of its nutrition from the soil; everything else comes to the plantings from the air. Wide passages provide plantings with a large amount of air and, accordingly, carbon dioxide, which plants need for growth and development.
Plants in narrow beds grow in one row or staggered in 2 rows. Each of them becomes “extreme”, so it receives maximum air and light. An important condition is that the passages must be mulched or seeded with grass or some kind of green manure.
How to do it: Mark the area with pegs and tighten the rope. The width of the bed is 45 cm, the length is arbitrary. The width of the passage between the rows is 75-90 cm. Fence the sides of the bed with sides of earth 8-10 cm high. We trample the soil between the beds well. The bed is ready. Sometimes it is fenced with a side made of wooden boards or a special ready-made border.
Pros:
- high efficiency;
- the garden bed is organized for several years;
- simple plant care;
- convenient to process and harvest;
- easy to install arches for temporary shelter of plants;
- innovative growing technology.
Minuses:
- many refuse such an experiment, considering it a waste of land.
Some tricks
The technology is called smart gardening for a reason. You can test different approaches, new products, and the experience of “colleagues.” There are several tricks that come with use. We have already talked about one - about covering material. It really makes maintenance a lot easier and there is no need for mulch. There are other interesting ideas:
- After crops that are “heavy” for the soil, sow oats, peas, mustard, and rapeseed. After a couple of weeks, juicy greenery grows. It can be left “under the snow” and dug up in the spring. Or dig it up just before the snow, along with the greens. The goal here is twofold - the young greenery rots, enriching the earth. This time. And two - weeds do not grow, since the shoots are friendly. This harvest makes my heart happy
- Use white covering material to extend the summer season and get an early harvest. Arcs are made from steel rod with a diameter of 8-10 mm. Drawstrings 2 cm wide or more are sewn into medium or high density spunbond. Arcs are inserted into them, spunbond is assembled on the wire so that the ends of the wire are free. The portable mini-greenhouse is ready. Stick arcs in at both ends of the bed. To protect the plants from frost, straighten the spunbond; you can open it for the day by collecting all the material on one side. The same design will also save you from overheating in the summer heat.
- Place a large metal barrel in the corner of the site. Place weeds and other plant waste in it. To fill with water. The greens will quickly rot and this slurry can be used for feeding. You just need to cover the barrel - the contents don't smell the best.
Warm
A technologically warm bed is a variation of a compost heap. The bed is based on organic waste. Organic matter, when decomposing, releases heat necessary for plants. A good option for growing heat-loving plants such as cucumbers, tomatoes, peppers. In addition, the “filling” of such beds creates comfortable conditions for early spring planting. It can be buried, based on trenches, or raised - for areas where melt water stagnates in the spring or groundwater is too close.
How to do it: first, a box 100-120 cm high is constructed, the length is arbitrary. The inside of the box is laid in layers: cardboard, sand, large, coarse, long-rotting plant waste (sunflower stems, Jerusalem artichoke, corn), then foliage and compost are laid. The topmost layer is garden soil, at least 10 cm. After laying, each layer is spilled with water.
A warm trench bed is made according to the same principle, only instead of a box, a trench 40 cm deep is dug and filled with layers of organic matter:
- 1 layer – stems, paper, branches;
- 2nd layer – tops, rotten vegetables and fruits, sawdust, turf;
- 3 soi – leaves that have fallen from trees.
It is important to ensure that all plants, foliage, tops and fruits are free of diseases and pests, otherwise there is a risk of infecting future plantings.
A warm bed can be used for 4 years. Initially, it is oversaturated with nutrients, then their percentage decreases. Therefore, it is important to plant crops with different nutritional requirements in the garden every year:
- 1 year – pumpkin, zucchini, cucumber;
- 2nd year – cucumber, zucchini, cabbage, tomatoes;
- 3 year – cabbage, peppers, tomatoes, beans, lettuce, carrots, beets;
- 4th year – greens, peas.
Pros:
- requires minimal care;
- can be used for up to four years;
- recycling of garden waste for the benefit of the harvest.
Minuses:
- in tall boxes the earth dries out faster;
- warm trenches are not the most suitable option for places where groundwater is too close to the surface.
Replacement of weeds with other crops
Weeds always appear where there is uncultivated soil. If the soil is occupied or densely dotted with economic plants, there are usually few weeds on it. The conclusion suggests itself - there should be no empty areas of soil. However, this method is not always applicable. A large number of garden and vegetable plants have a branched stem-leaf system and require planting at fairly large distances (up to half a meter, for example, for cabbage or zucchini). In this case, it is necessary to use mulching or use of green manure. An alternative is to use a covering material, which will be discussed below.
Forms of beds
### https://img.7dach.ru/image/600/00/00/48/2018/01/22/3f59fadc60.jpg###
The beds are usually made in the form of strips. But they can be of completely different configurations: round, square, triangular, rectangular. Creative summer residents design plantings with plants in the shape of animals, creating a composition with a center from which paths in the form of rays diverge.
If you want something original, you can make Holzer hilly beds. They are different: vertical, suspended, hilly. Their design protects plantings from wind, noise, and heavy rainfall. Spiral beds will also look unusual. It is better to grow herbs for gourmet dishes on them.
Using Weather Features
Oddly enough, our fairly distant ancestors, about 100-200 years ago, came up with a very effective way to combat weeds, which consists in planting plants at the right time and then simply helping them go through the period when no weeds are afraid of them.
In this case, however, it is necessary to weed the beds twice a season, but weeding will be carried out easily and quickly, since in both cases, again, young shoots of weeds are destroyed. The point of the method is to know the local climate, and specifically, the first spring rainy period of the season. Before planting the main plants, the area is pre-watered, which will lead to the germination of weeds. Weeding this first wave is very easy because the plants are still very small. You don’t even have to weed them, but select them manually.
After that, economic plants are planted. It is necessary to select the planting time so that the rainy season begins in 2-3 weeks. Usually it occurs at the end of April or beginning of May. After the rains, the beds need to be weeded again, but there will be even fewer weeds there. And, in fact, this will not be weeding as such - the number of weeds in the garden bed will be very small.
1-2 weeks after the rainy period, garden plants will already be in full force and they will not be afraid of any weeds - twice thinned out, they simply will not be able to compete with adult plants in the fight for light and moisture, and will die on their own.
Main requirements for beds
There are a number of requirements for any garden bed. When planning a site, you need to consider the following nuances:
Solar lighting. In the morning and evening the sun should illuminate the plants. It is these not too hot rays that contribute to high-quality photosynthesis. It is important to arrange tall plants from west to east. This way they will be evenly illuminated by the morning sun.
Ease of processing. Processing the beds is easy, comfortable, and each shoot is easy to reach with your hand.
Availability of paths. Trampling the ground means reducing productivity. The soil should always remain loose, well ventilated, and air should flow freely to the roots. It is advisable not to walk along the beds, but to make paths next to them.
Taking into account the characteristics of the site. If the area is dry and there is no stagnation of water, then the beds can be laid out level with the paths or even deepened a little. If the soil is too wet, it is necessary, on the contrary, to make raised beds.
Freezing compost
During the composting process, the weed seeds contained in it can be stored and then germinate after being applied to the soil. To prevent this from happening, you need to add such organic matter before winter or in early spring, when return frosts are expected.
At the same time, it is important that the seeds do not freeze themselves, but have time to sprout. It is the sprouted sprouts or young shoots that will most quickly die from the cold.
Related article:
Main characteristics of a modern brush cutter
How to arrange the beds?
It is believed that the beds should be located according to the compass. Regular beds with low plants should be located from north to south. But this is a general rule; it is also necessary to take into account the individual characteristics of the site.
When preparing beds, it is important to know the following nuances:
- The arrangement of the beds from north to south is especially suitable for shaded and low-lying areas.
- In dry, sunny places, on hills with light, non-moist soils, it is better to place the beds from east to west.
- Beds on a site with a slope should be placed horizontally. They must be across the slope. In this case, the plants will receive the same amount of moisture.
- The optimal width of the bed, according to reviews from experienced gardeners, is 45 cm for all crops. The best lengths for beds are considered to be 9 m, 3 m, 4.5 m. Such standardization will make it possible to rationally distribute crops across the site and calculate the amount of fertilizer needed.
- If the area is uneven, it is better to plant plants on the south side. This way they will receive the maximum amount of sunlight, and the crop will ripen faster.
Professional gardeners have calculated that with proper planning of a plot, only 1 acre is enough for one family. You just need to use the land resource correctly.
Irrigation system
A significant part of gardening work is watering the plants. If you use lazy beds, you will have to water much less often. But even in this case, it is better to route the pipes around the area correctly. You already have a plan for the location of the beds in your garden. Now add flower beds, bushes and trees. Get a plan for the placement of plants that need to be watered. Now you should think about how to lay water pipes in the garden so that any “irrigation object” is no more than 2-3 meters away. If you do this, then you will have to pull a small hose to each bed, which is much simpler.
Homemade drip irrigation system made of polymer pipes, water source - barrel
It’s even better if a hose for drip irrigation is installed in the smart garden bed. This will reduce water consumption and increase yield. Yes, at the same time. A drip irrigation hose is a polyethylene tube with small holes through which water drips drop by drop. When planting, plants are planted next to the holes. As a result, water is supplied to the root, the plant receives a sufficient amount of moisture, and the spaces between plants remain only slightly moist (due to the redistribution of moisture in the soil).
When using drip irrigation, you will have very little work. You open the tap, wait a certain period of time, close the tap. All. Hoses for drip irrigation are available for connection to a water supply (sold by the meter), and are available in the form of kits with a small pump that will pump water from the container. The price range for hoses for drip irrigation is significant - prices differ significantly. No matter how limited your finances are, don't buy the cheapest hoses - they won't last more than one season. It’s better to pay a little more for a quality product and use it for several years. When choosing kits for drip irrigation, you must also consider the area to be irrigated. But, most likely, it will suit you, since lazy beds are rarely large. Read more about drip irrigation kits and manufacturers here.
Which beds are better: reviews from experienced summer residents
Each summer resident has the right to decide which beds to use and how to place them on his plot. We invite you to find out reviews from summer residents who have already tried various options for garden beds and share their opinions.
Mikhail Taulin: “My dacha is located 20 km southeast of Moscow. Our climate is humid; in summer the heat lasts from several days to 1.5 months. I don’t think that such conditions are the best for gardening, so I decided to make raised beds. I dug trenches 40 cm deep, removed sandy soil, and built a wooden box. Then I covered the inside with geofabric to protect against moles and weeds. I filled the box with manure, black soil, mixed with soil that I dug out of the trench. This is the third year I have been growing vegetables, herbs, and strawberries in beds. Everything is growing well, the result makes me and my family happy.”
Olga Timchak: “I like pyramidal beds. They are very easy to process and look beautiful. They can be used not only for growing herbs or strawberries, but also for planting flowers. If the pyramid is installed correctly, then you can get impressive harvests from such a bed. The plants in the structure do not interfere with each other; they have enough light and warmth.”
Olga Platonova: “The simplest and most inexpensive way to grow vegetables is narrow ridges on fertile soil. The optimal width of such beds is 45 cm. The row spacing is at least 60-75 cm. The aisles must be wide so that the plants receive the necessary heat and light. The soil for the bed needs to be dug up to a depth of 25-30 cm. The soil inside the trenches is leveled with a rake and side borders of 8-10 cm are made around the edges. The bed is ready."
When is the best time to do it and what to plant?
Fall or late summer are better times to create your own raised beds. If you start working in the spring, during this period the impact of emerging processes on the development of seedlings is very weak and imperceptible.
It is better to fill fences created in spring a month before planting seedlings.
Such vegetable gardens will decorate the yard
To fill raised beds at the dacha with your own hands, photos of which are presented below, the autumn period is most suitable.
Precisely when the development of internal processes in the earth continues. The layers in the box that have rotted over the summer provide the plant root system with the optimal amount of useful elements.
Plant rotation
Seedlings are usually planted immediately after the construction of structures. After harvesting ripe vegetable crops, they begin to alternate them annually with healthy herbs, for example, parsley, dill. This allows for abundant harvests every year.
